My First Polar Alignment Under a Supermoon
Last night was a pivotal moment in my astronomy journey. Not only was I getting to use my newly acquired SkyWatcher Explorer 150PDS telescope and EQ3-PRO mount in full for the first time, but I also practiced polar aligning my telescope and caught a glimpse of my first full moon. Here in the UK, it was no ordinary full moon either, but a partial eclipse of a supermoon. Also known as the Harvest Moon, it was the second of four supermoons this year. Supermoons occur when the Moon is at its closest point to Earth in its orbit, making it appear larger and brighter in the night sky.
This wasn’t the first time I had taken my telescope and mount outside, but it was the first time I would use the Go-To system to track the night sky. Setting up my equipment outside felt like packing to go on holiday – you’re never quite sure if you have everything. Last night was no exception. I found myself darting in and out of the house, grabbing all sorts of essentials.
In total, I gathered my SkyWatcher Explorer 150PDS telescope, my SkyWatcher EQ3-PRO mount, and a bag full of accessories: the go-to system, a 10m extension lead to power the mount, my trusty Canon 550D camera, viewing lenses, adapters to connect the camera and lenses to the telescope, and a few other bits and pieces. Check out my review of these products and the motivations behind buying them here. By the time I had everything outside, I felt like I’d packed for a month-long trip rather than a night of stargazing.
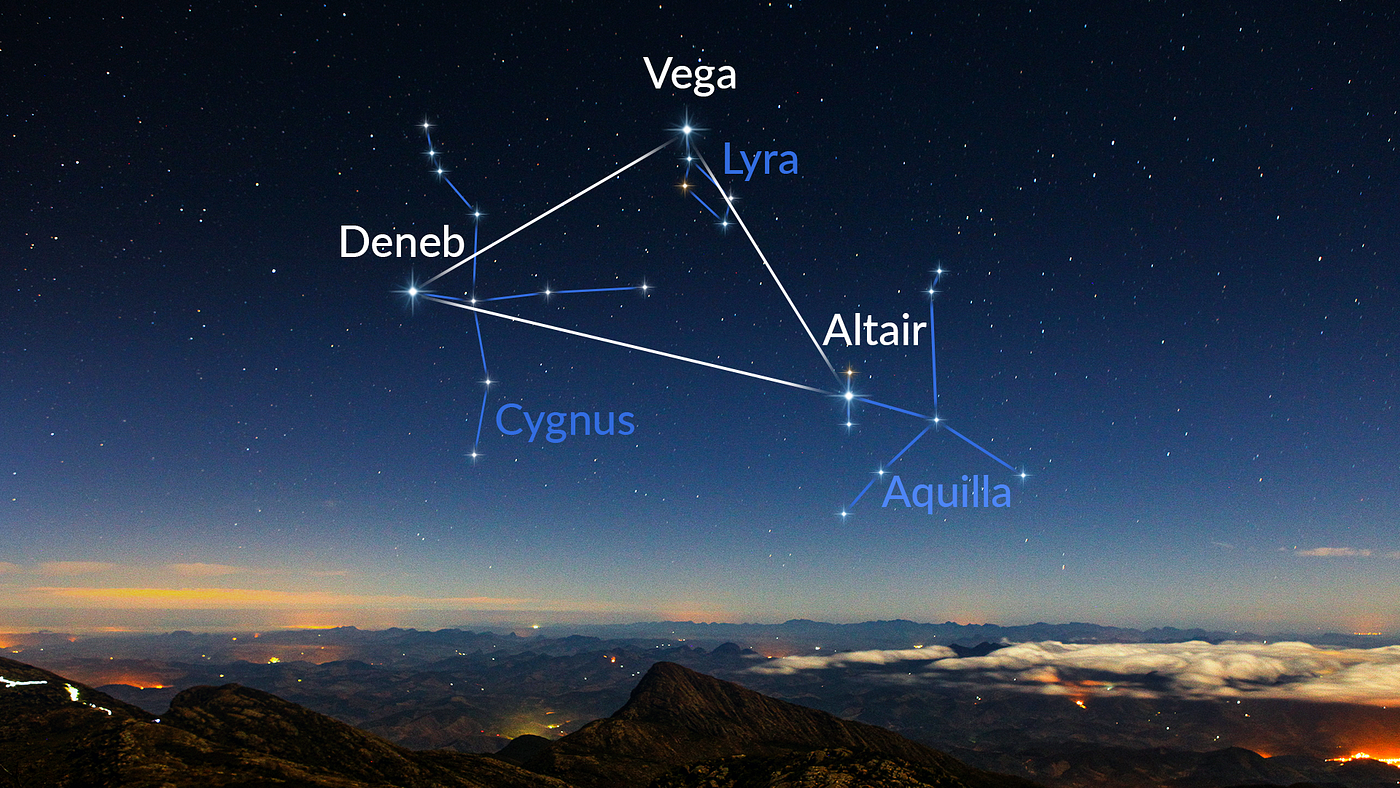
The night was perfect for observing. There were very few clouds, and the supermoon shone brightly, illuminating the entire garden with its radiant glow. Unfortunately, its glow also illuminated the entire night sky. The moon at its brightest wreaks havoc for astrophotographers and makes it near impossible to see anything. I did make some attempts to take images of some of our brightest stars at this time of the year: the summer triangle (Deneb, Vega, Altair), as well as the supermoon – see below.
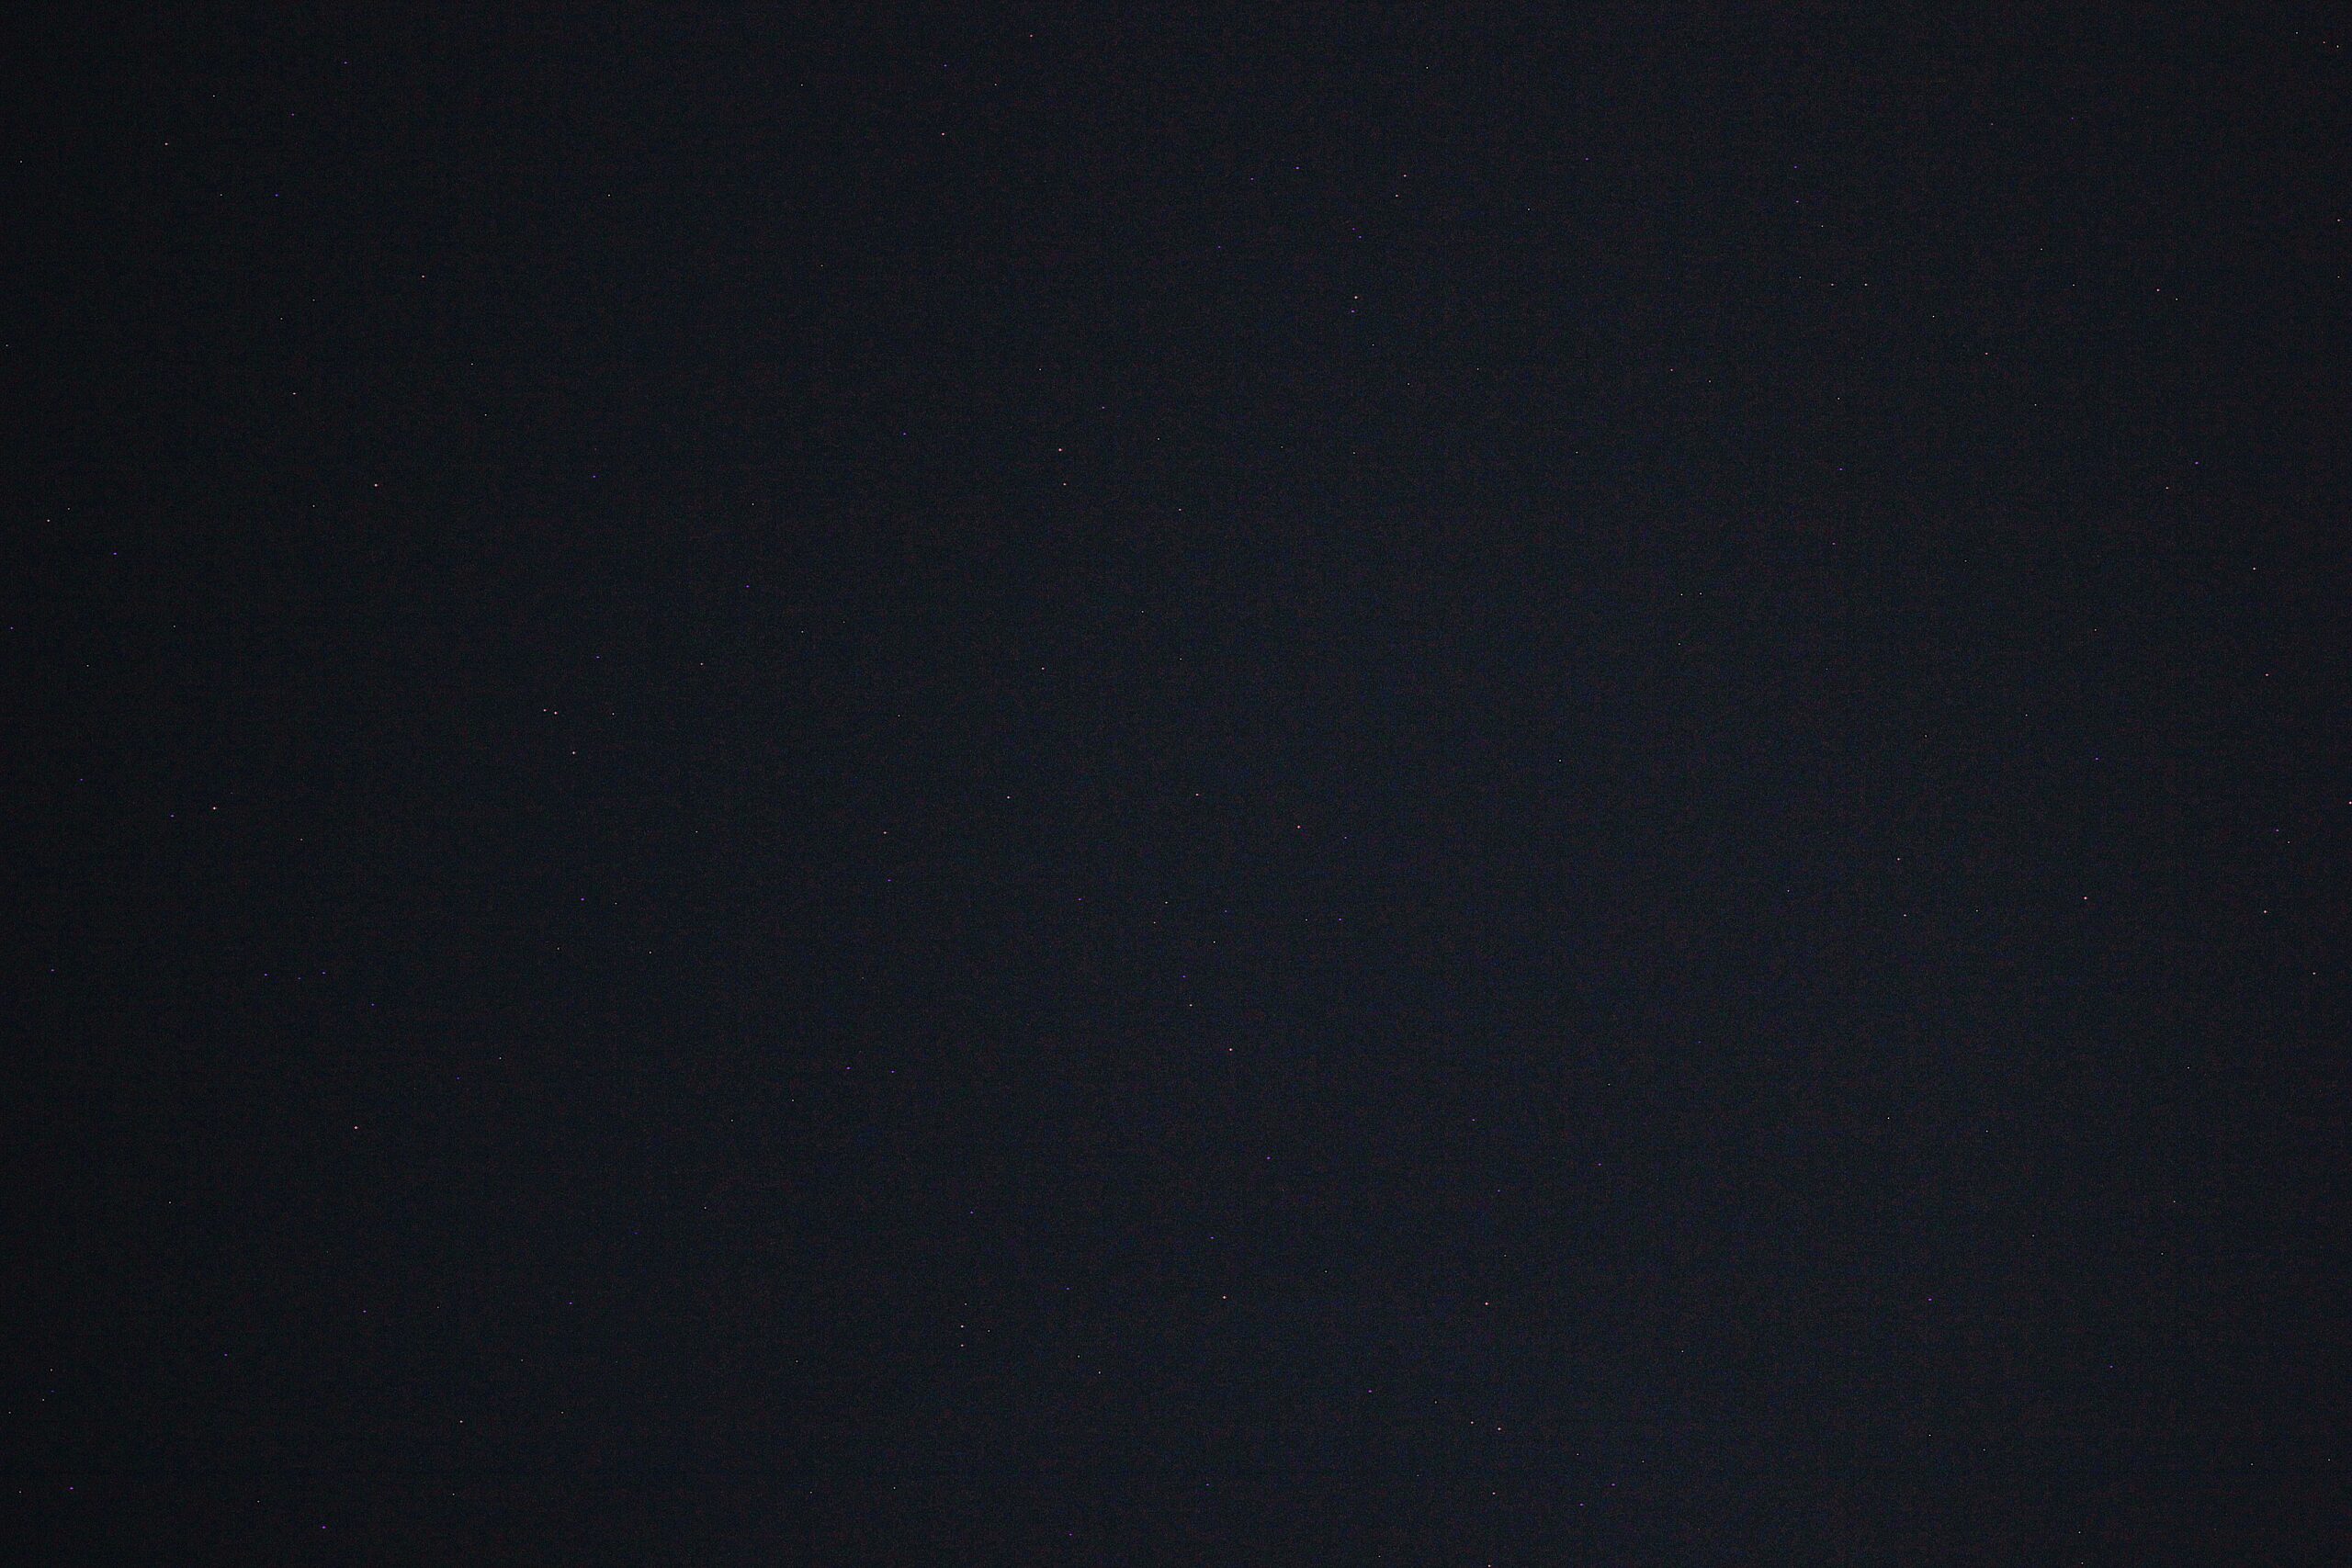
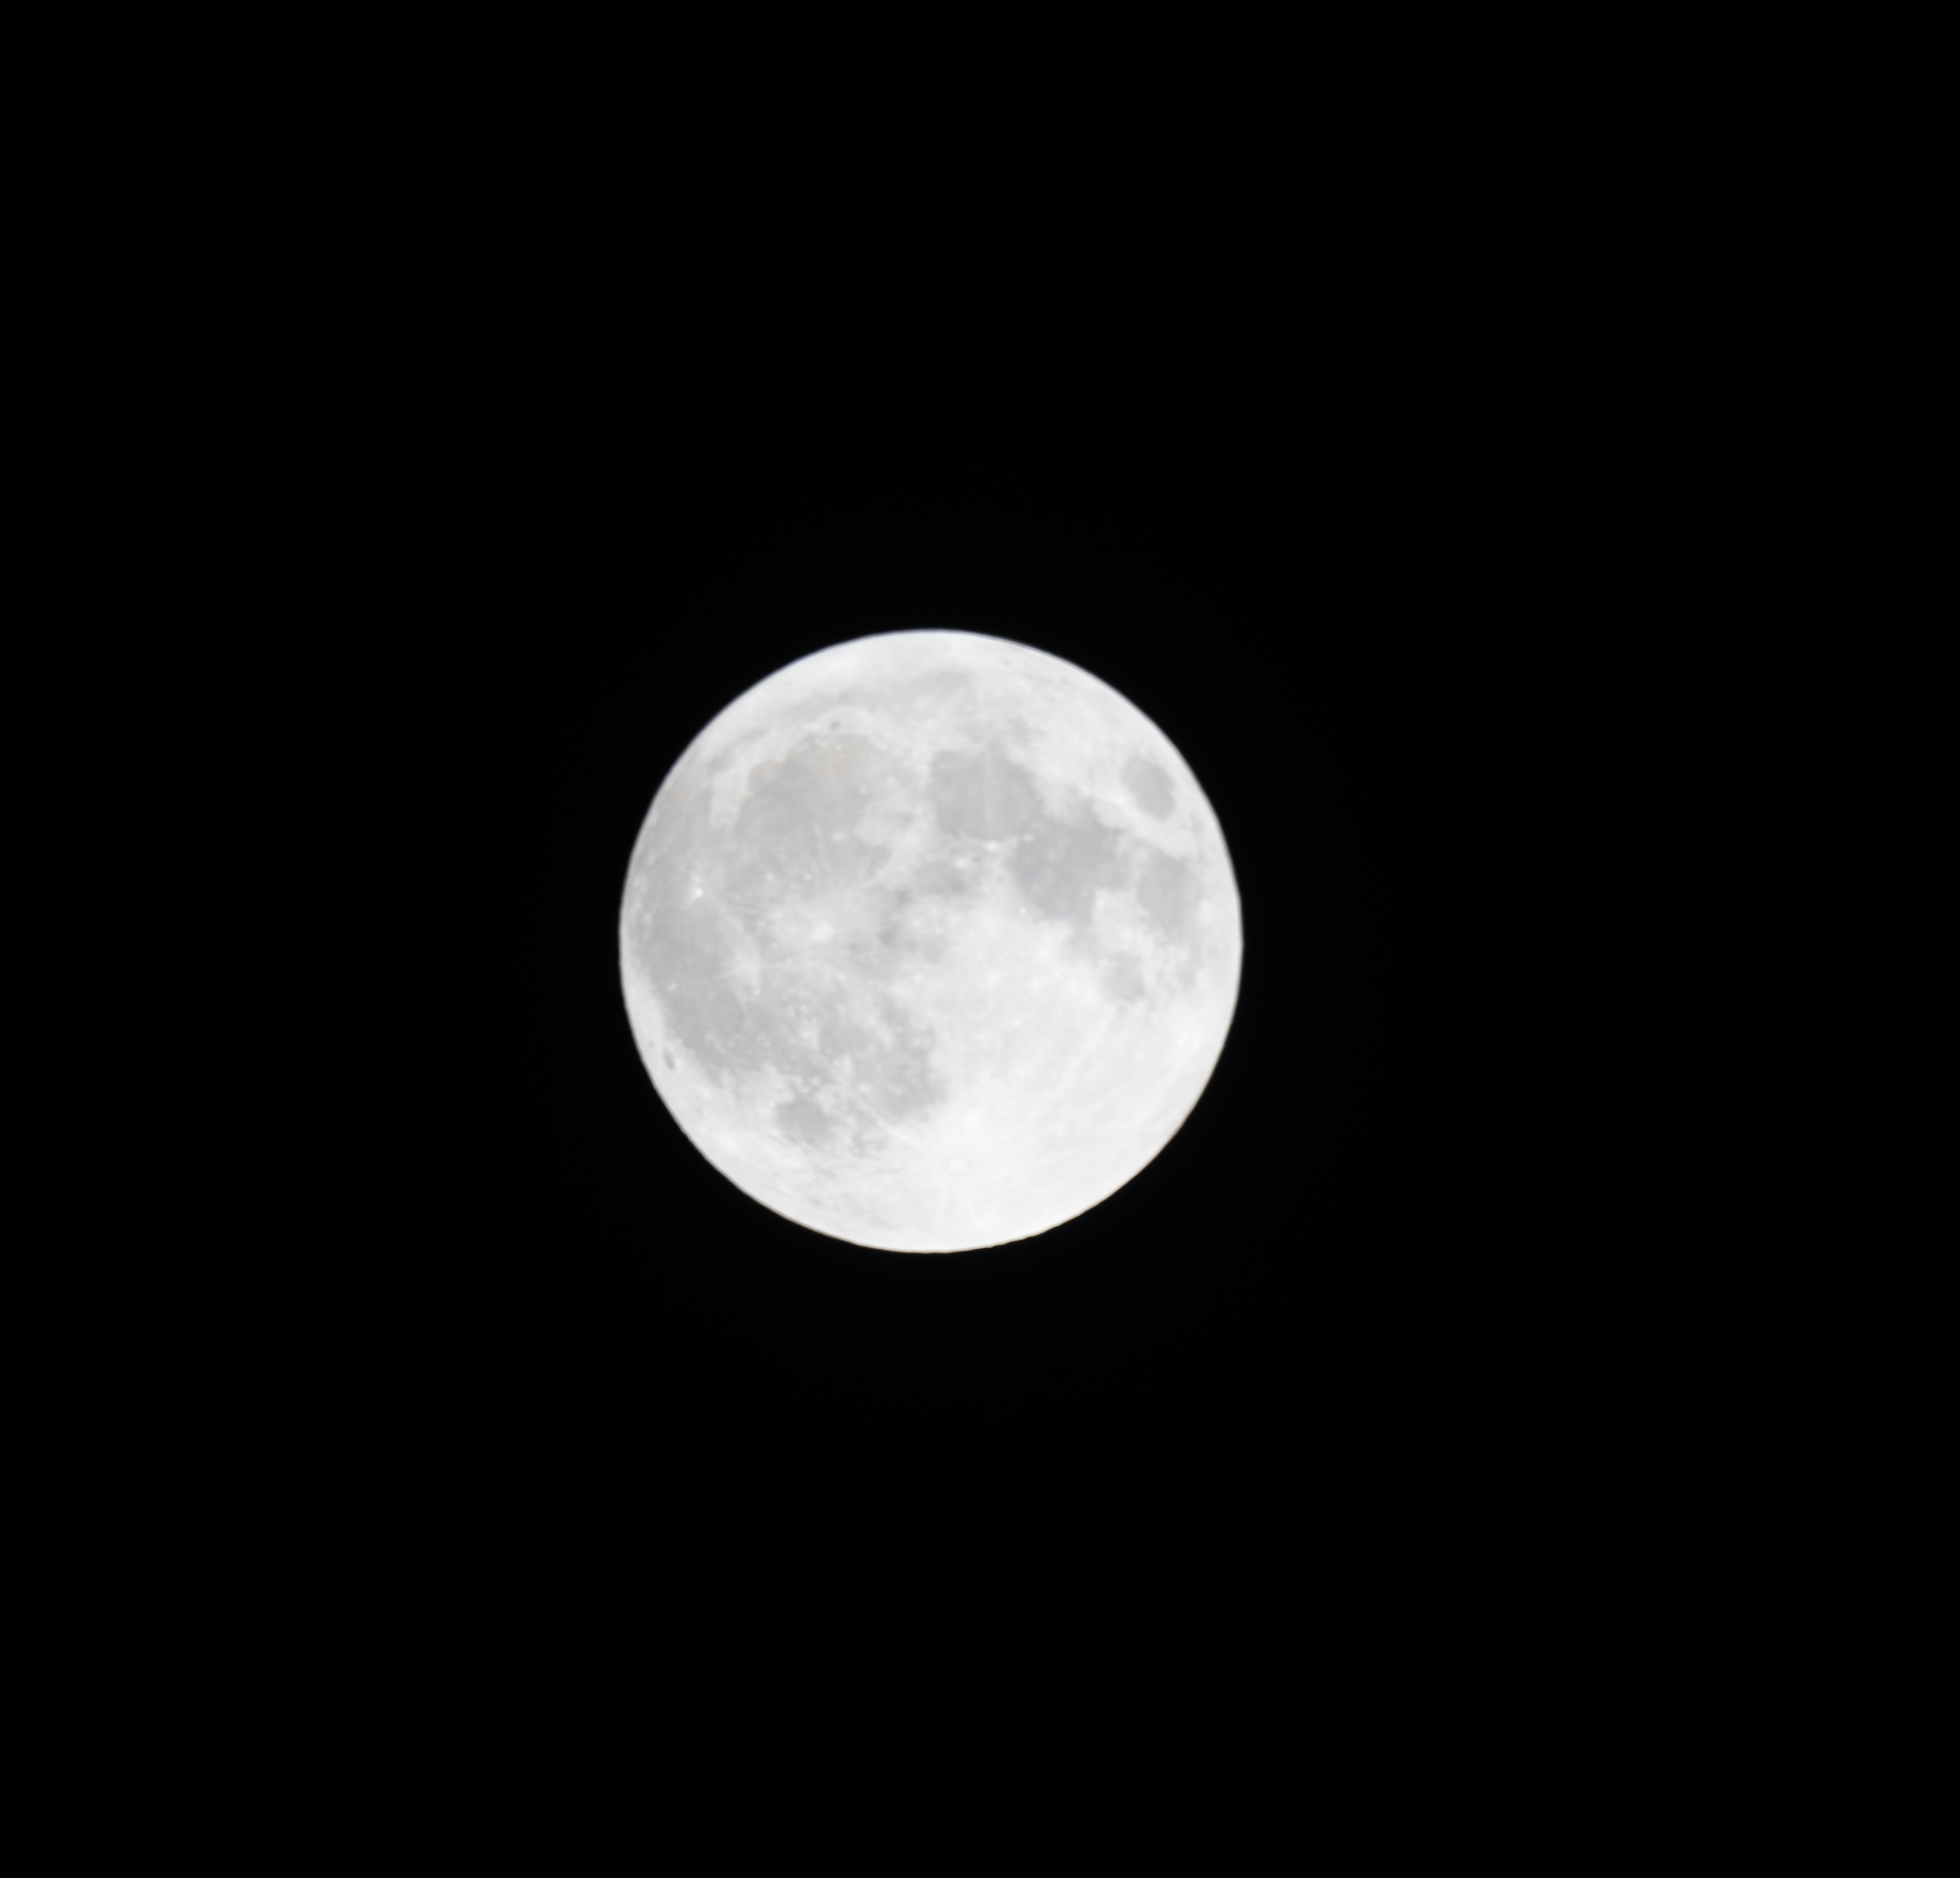
My ability to capture solar system and deep sky images is still quite poor as you can see from the quality of the images. Despite research and courses, I’m struggling to take decent images. I don’t know if my telescope or camera isn’t powerful enough, whether my telescope is not collimated correctly, or whether my camera settings are incorrect. Or it is simply not the right conditions on that day. There are many questions for me to answer yet, and they will be answered in time, but it’s all still a learning curve. Those types of discussions require dedicated articles. The best bit of experience I achieved last night was how to track stars with my go-to system and with that was learning how to polar align my telescope.
Polar Alignment: The Learning Curve
Polar alignment is something I’ve researched extensively but haven’t yet tried in practice. There’s a big difference between reading how to do something and actually doing it, as I soon found out.
Polar alignment is necessary for the telescope to track objects in the night sky accurately, particularly if you’re planning on taking long-exposure photographs. It makes your telescope move in sync with the rotation of the Earth so that pictures never blur, and you can stay focused on a particular object.
To achieve polar alignment, you need to align your mount’s axis with the Earth’s rotational axis by pointing it toward the North (or South) pole. For people in the Northern Hemisphere, we are aiming for the North Celestial Pole (NCP), which is close to the bright star of Polaris (the North Star). Polaris itself isn’t exactly at the NCP, but rough alignment is adequate for casual observing. For astrophotography, though, you want to get as exact as possible.
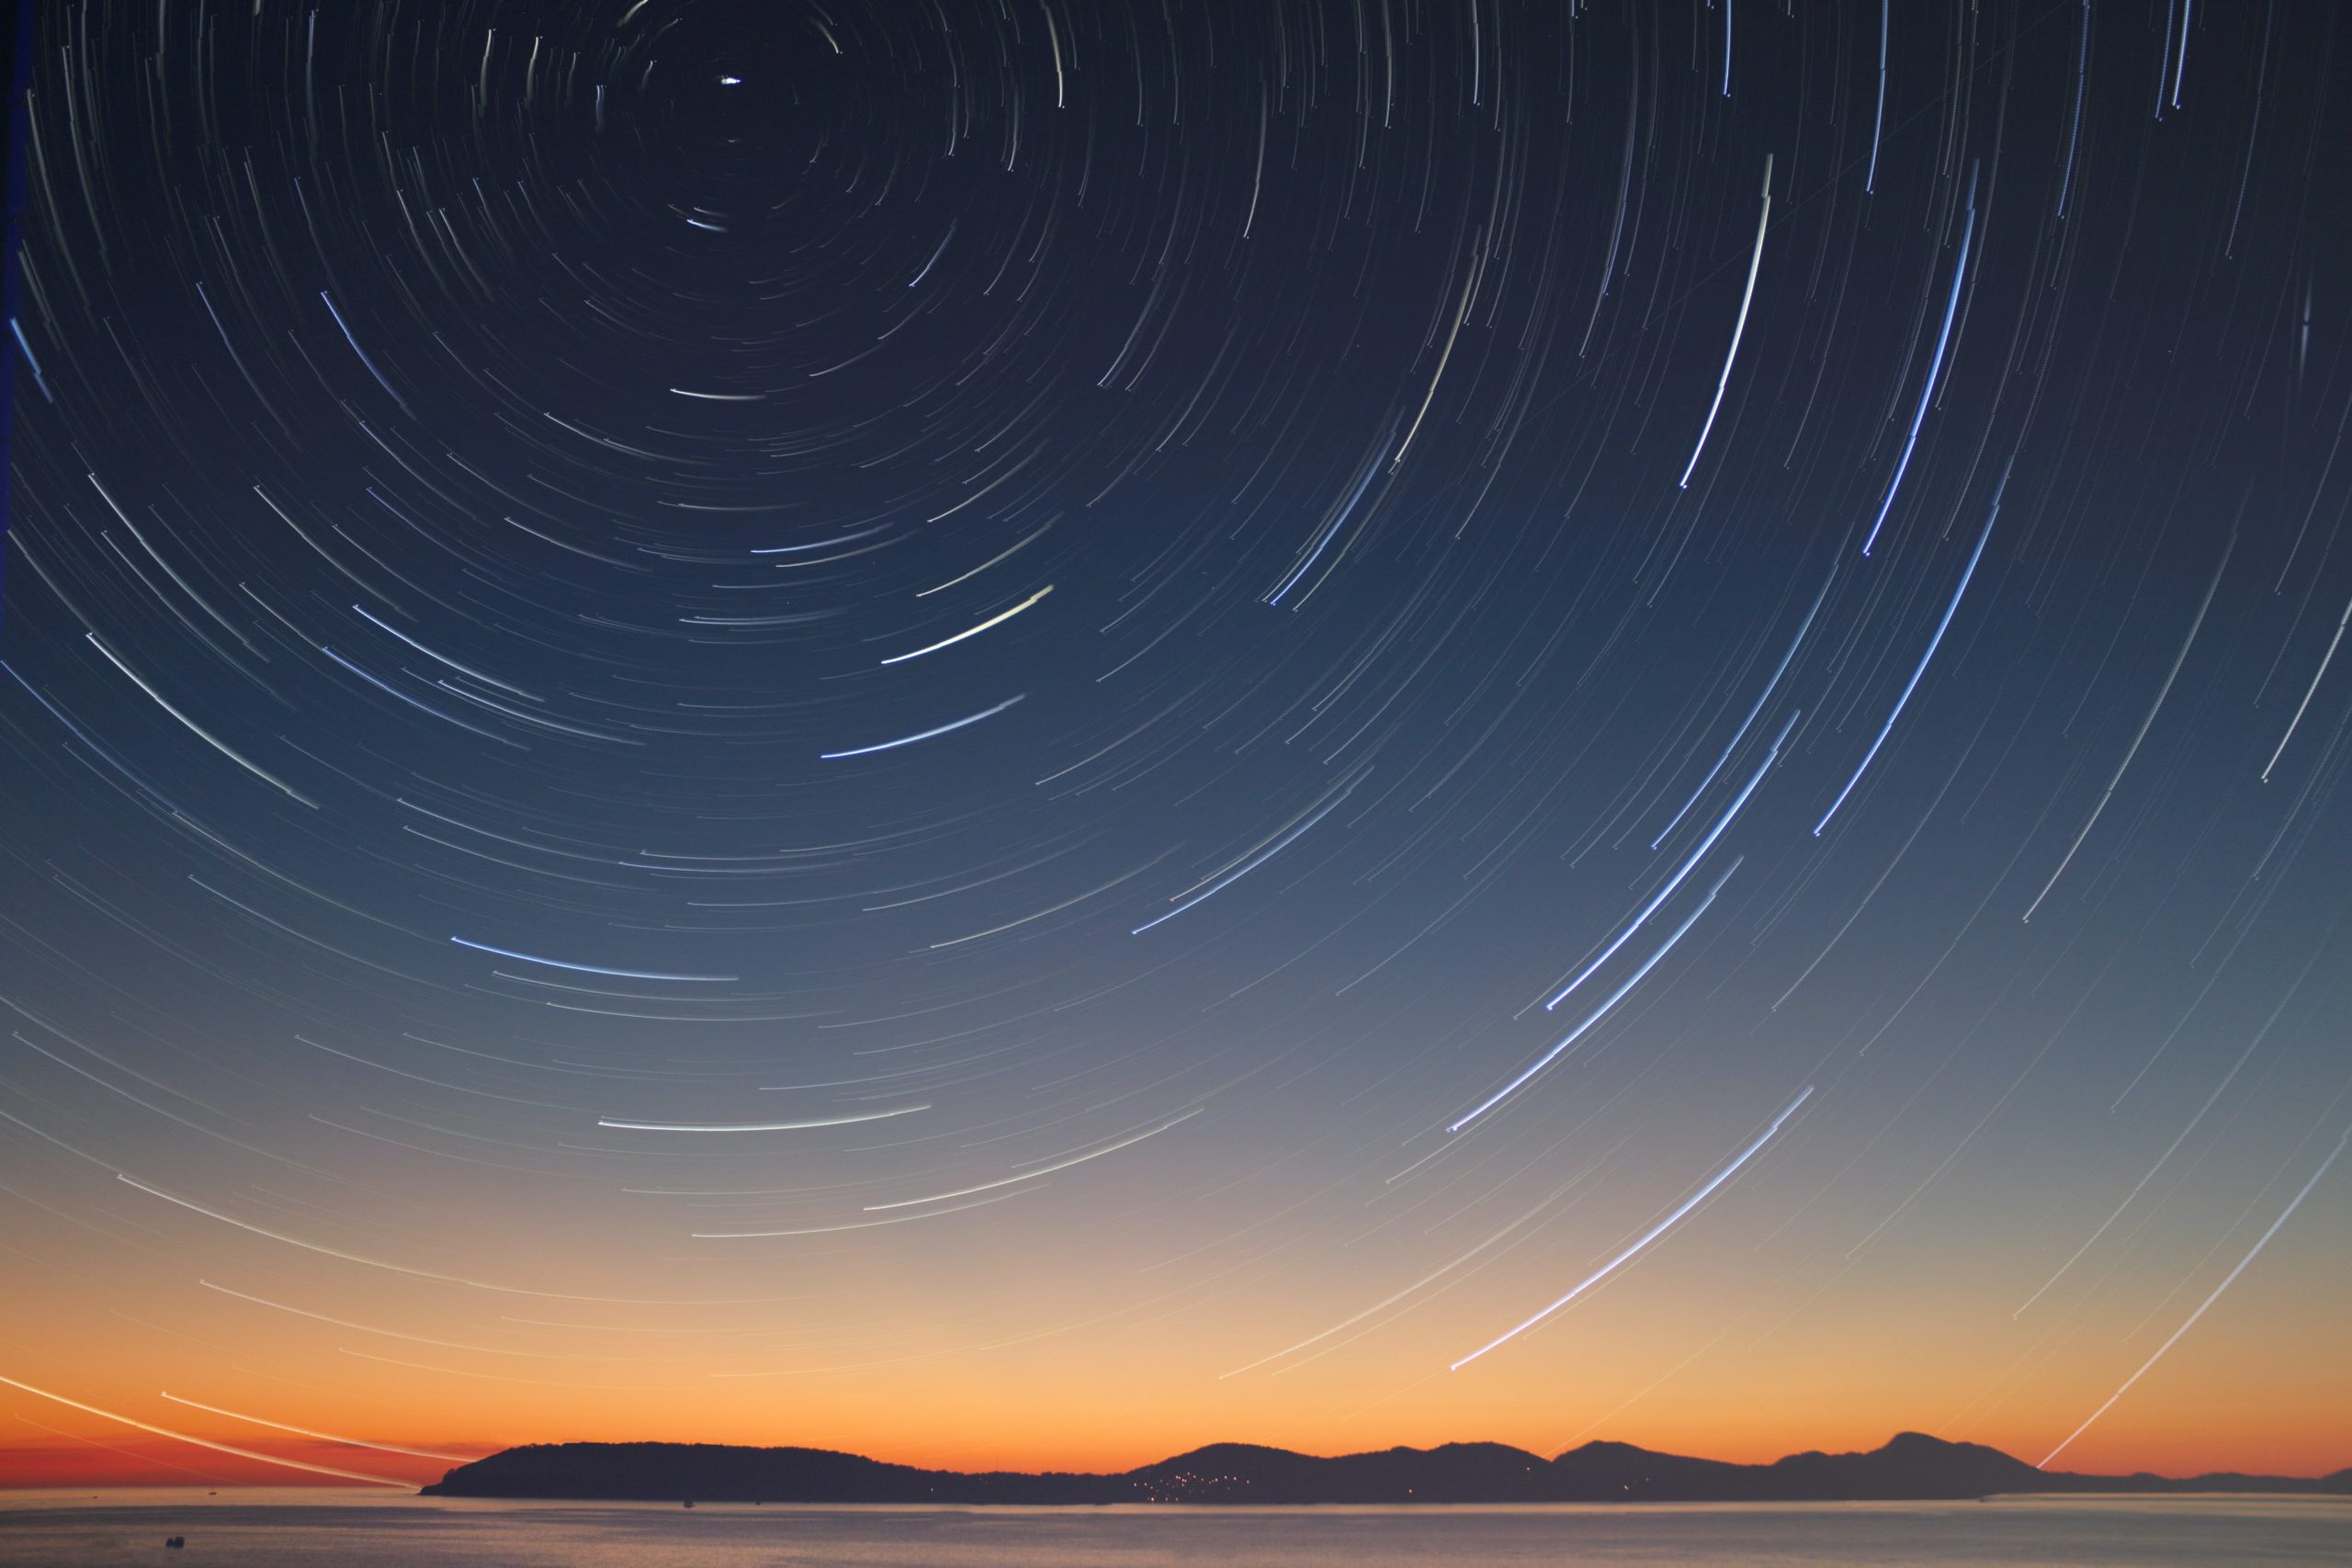
Polaris (and all the other stars) rotate around the NCP. We use Polaris as it rotates tightly around this point. Picture the Moon rotating around the Earth, this is what Polaris does around the NCP, and it is always in our night sky. To find this point we use a polar scope, which helps aim your mount at the NCP. As the Earth rotates throughout the day, Polaris’ position changes and you need to adjust your polar scope.
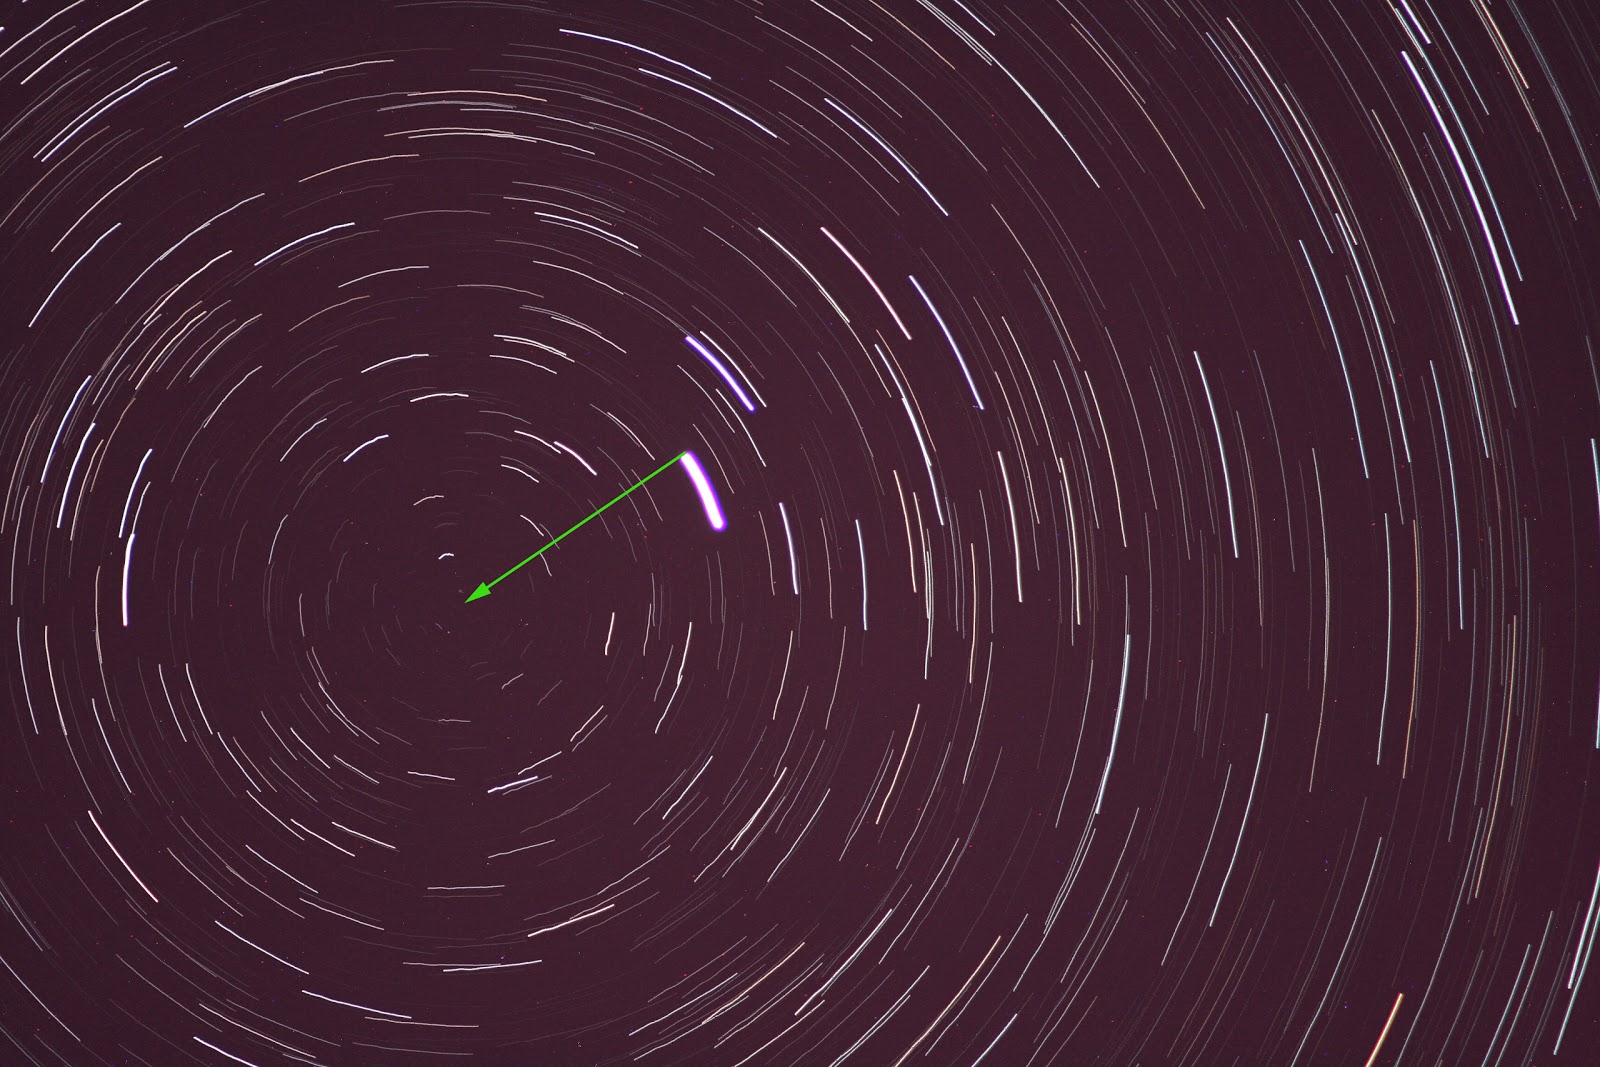
The EQ3-PRO mount comes with a built-in polar alignment scope, which helps immensely with the process, and I don’t have the experience of polar aligning without one at the moment – though the principles on how to polar align will be the same.
Ensure before you begin the process of polar aligning that your mount is level. This is one thing I did not do and I remembered whilst writing this. Many mounts have a leveller bubble on the top and I did not check that. Instead, I used the classic “it looks good to me” approach. Spoiler alert: it’s always better to use the tools provided! Next time, I’ll double-check the level before starting.
Finding Polaris
So, which one is Polaris? There are a few ways to identify our North Star and once you get the hang of each of them, you’ll be able to find it at any time of the year.
To find Polaris with my own eyes, I look North and find the Ursa Major constellation (often referred to as the Big Dipper). Once you find the Big Dipper, you can draw an imaginary line along the two end stars in the bowl of the Big Dipper and the first star you come to is Polaris. This sounds easy, but when you have streetlights, houses, and the supermoon in your way it’s not always easy to find Ursa Major, Polaris, or draw any imaginary lines.
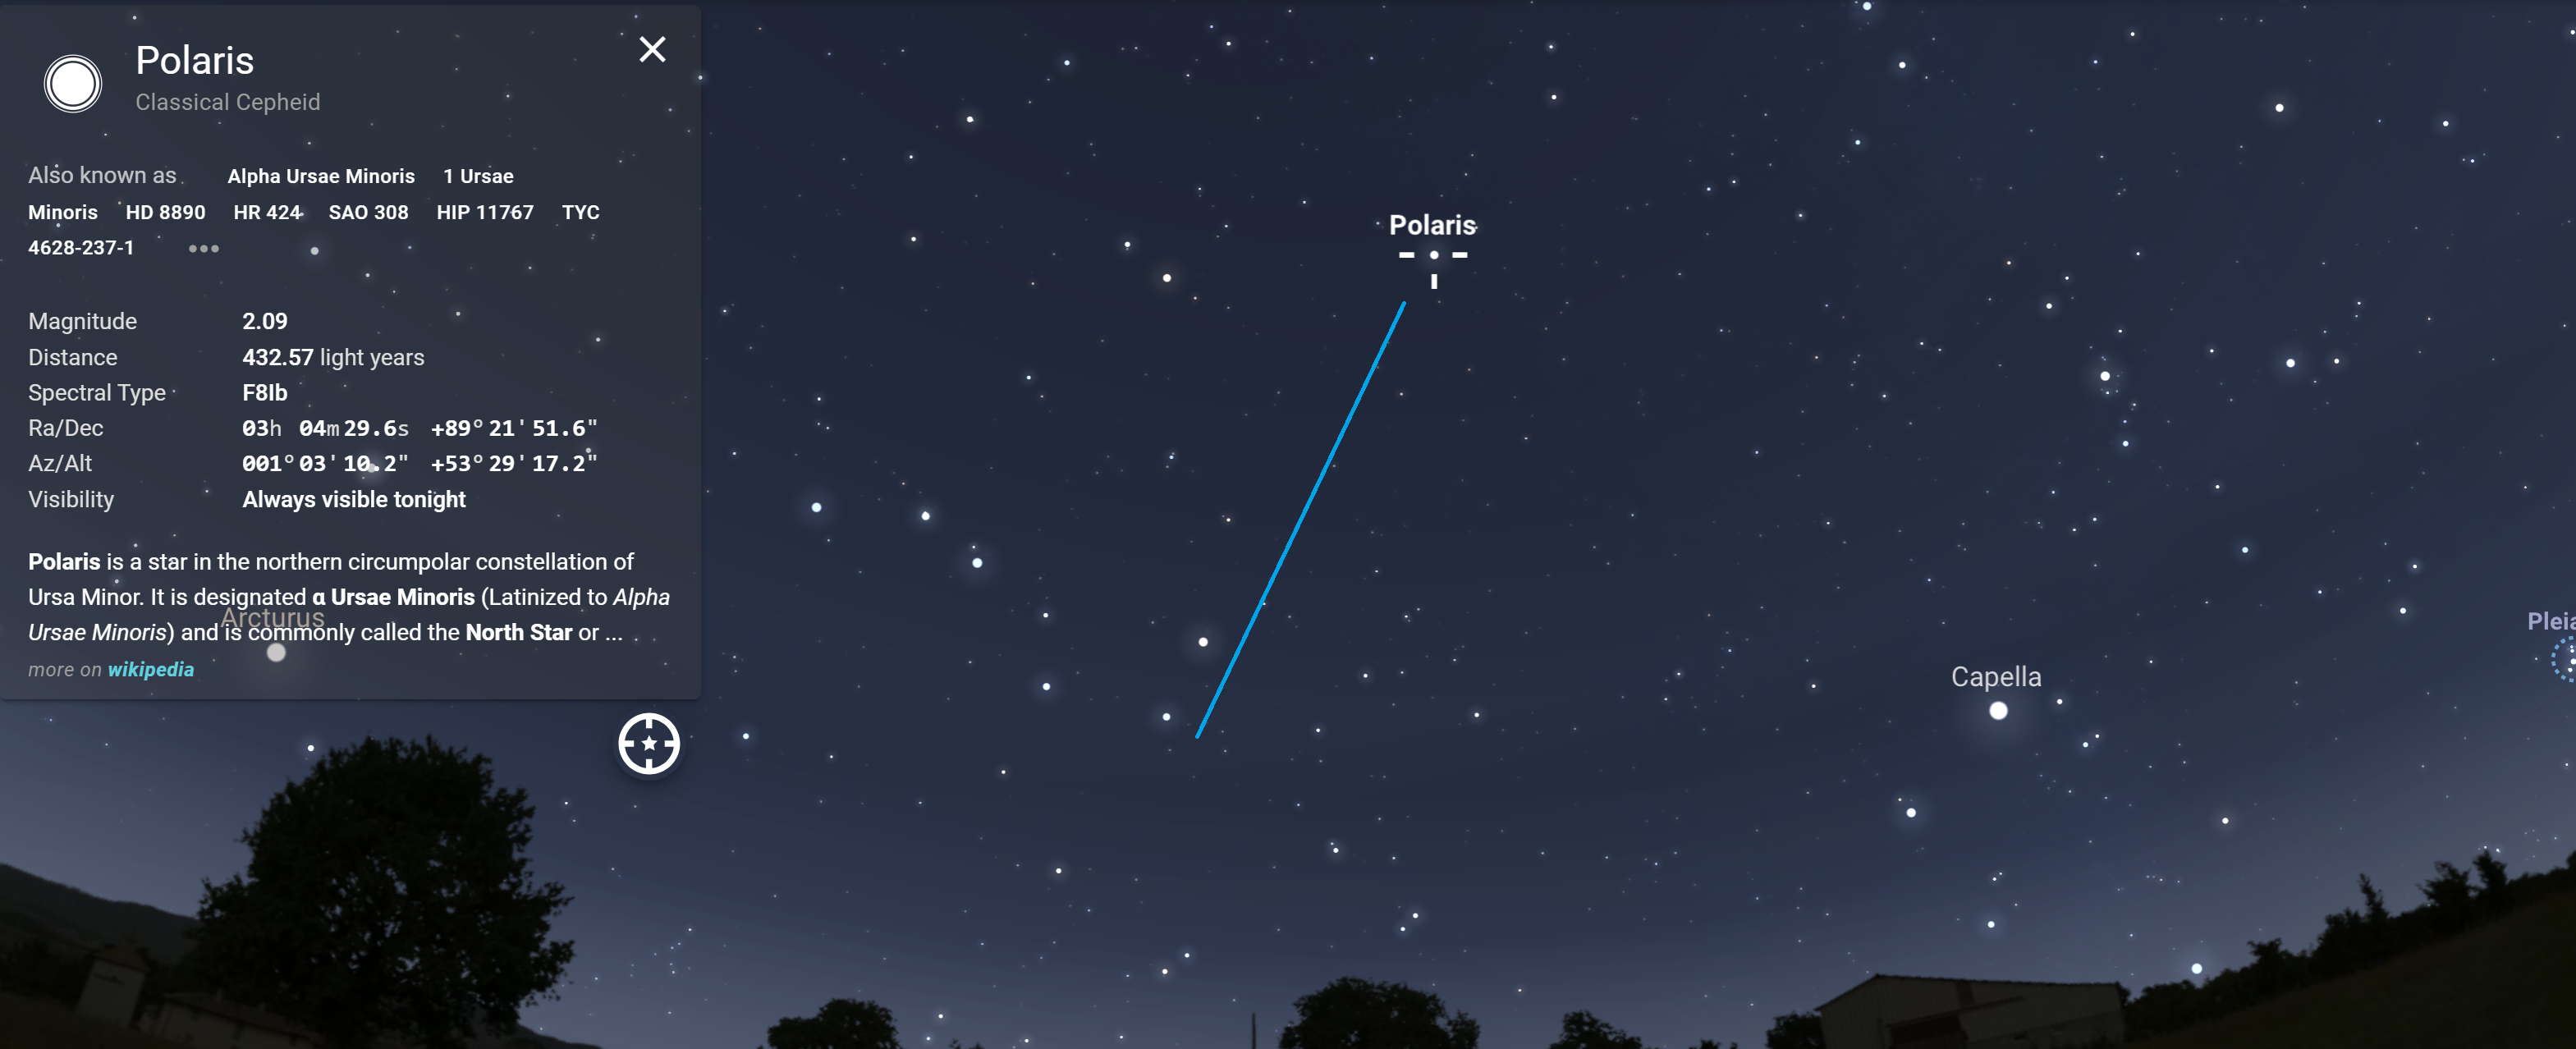
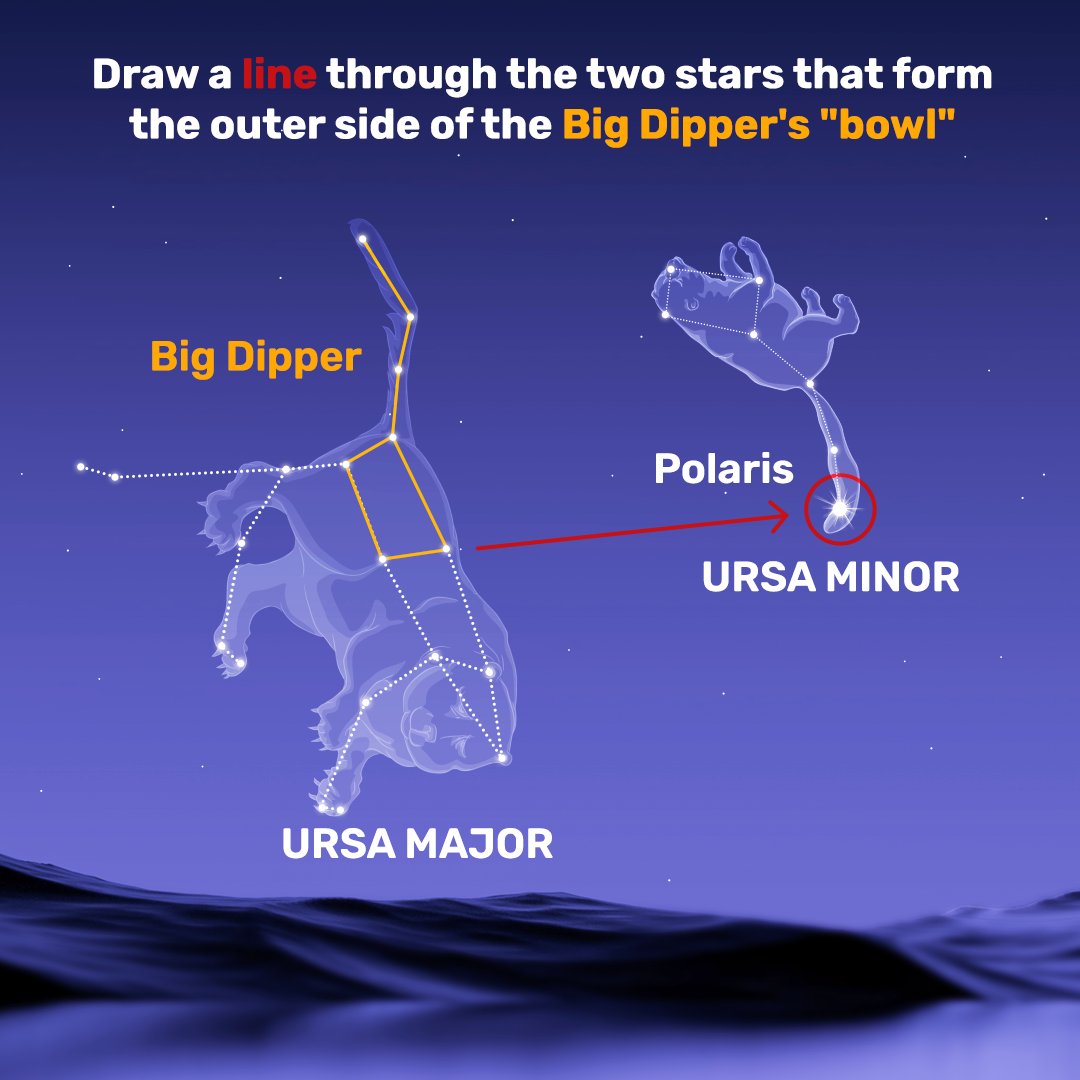
Even though I’ve practiced spotting Polaris, I still double-check with apps like Stellarium and NightSky apps to confirm it’s correct. Don’t be afraid to triple-check on the apps, you’ll be surprised how much else you pick up by frequently using them.
A quick tip for beginners: if you have 5 minutes, spend time during the day using these apps to familiarize yourself with your surroundings. There are even web versions you can browse if you are on your work computer, no need to install. Know which parts of the night sky will be visible from your viewing location and plan accordingly. The first thing I did was learn about my house and garden in relation to North, East, South and West, so I could navigate more easily and learn which parts of the night would be available to me.
Many people may not be able to see Polaris because of their homes or trees, and it most definitely won’t work if you are in the southern hemisphere. For that, I don’t have a solution yet, but there are several smartphone apps available that can help you polar align your equatorial mount without relying on Polaris. I’m fortunate that my garden offers an unobstructed view of the Northern sky year-round, but I know not everyone has that luxury. If I did not have it, it would be a huge barrier to my astronomy journey.
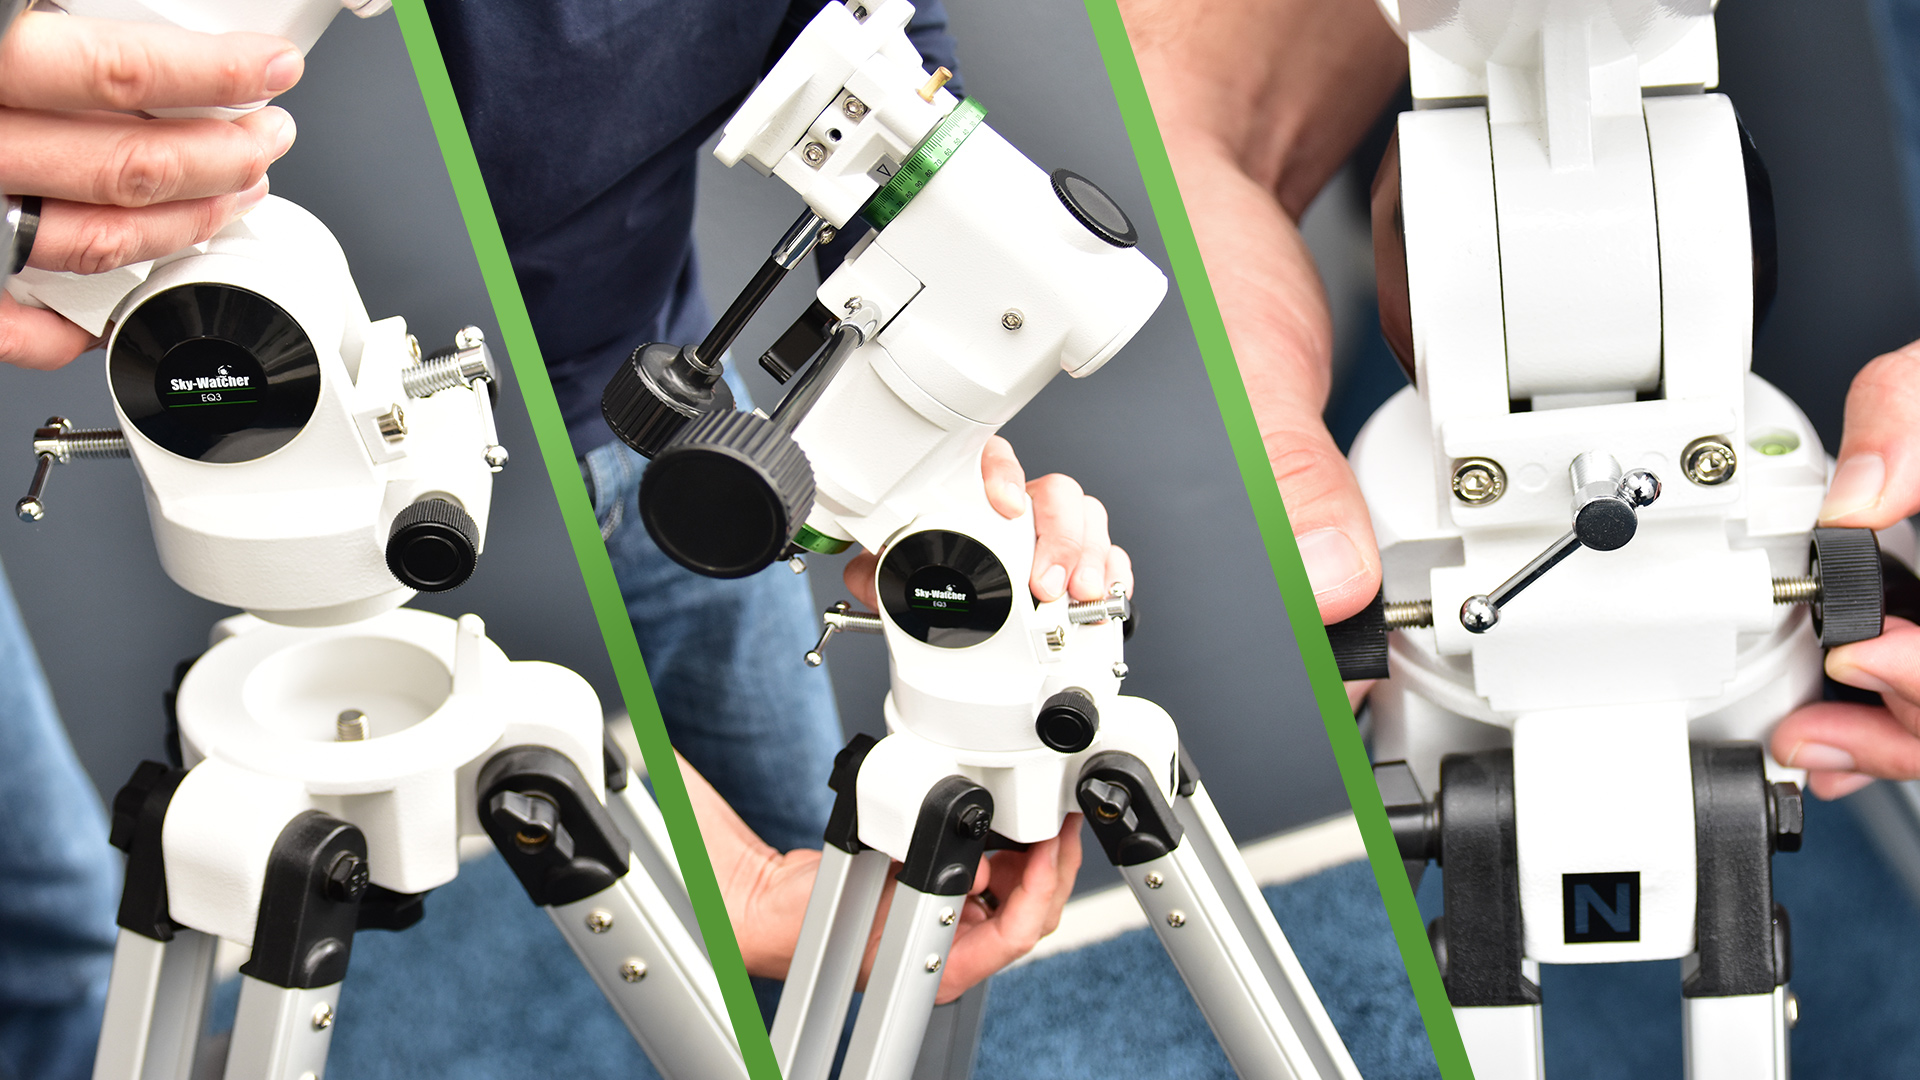
Once I knew where to find Polaris, I would point my mount towards it. On the mount, at the top of the polar scope, you will find a hole. This needs to be pointed towards Polaris so that you can look through your polar scope. Don’t worry about where Polaris is right now, we will adjust it later, this is just a rough alignment for now. To open this hole, some mounts require that the telescope is on its side.
Setting the Latitude
The next important step is to step the latitude of your mount.
This is a critical part of polar alignment because it ensures the mount’s axis of rotation matches the Earth’s. Every location on Earth has a specific latitude, which you can find easily online or through apps. For my location, it’s around 53 degrees.
On the side of the mount head, there’s a scale running from 0 to 90 degrees. By loosening and tightening two screws on either side of the mount, you can adjust the latitude to match your location. For example, since I’m at 53 degrees, I set the mount to that exact number.
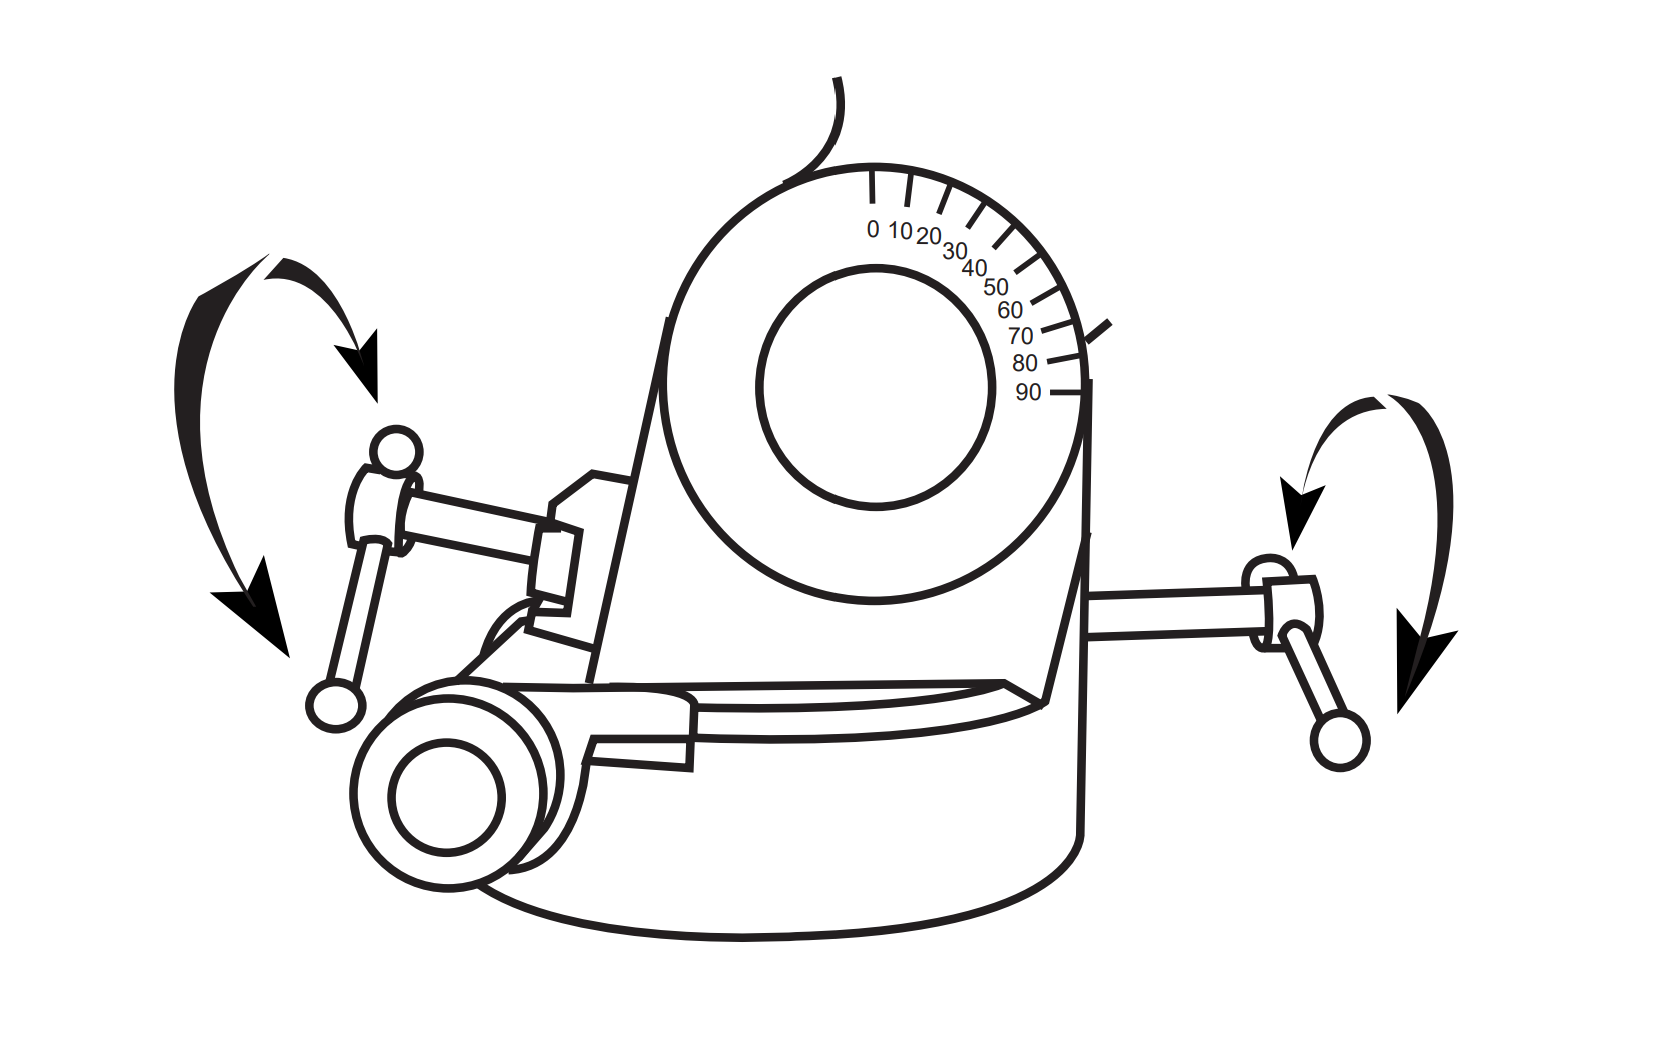
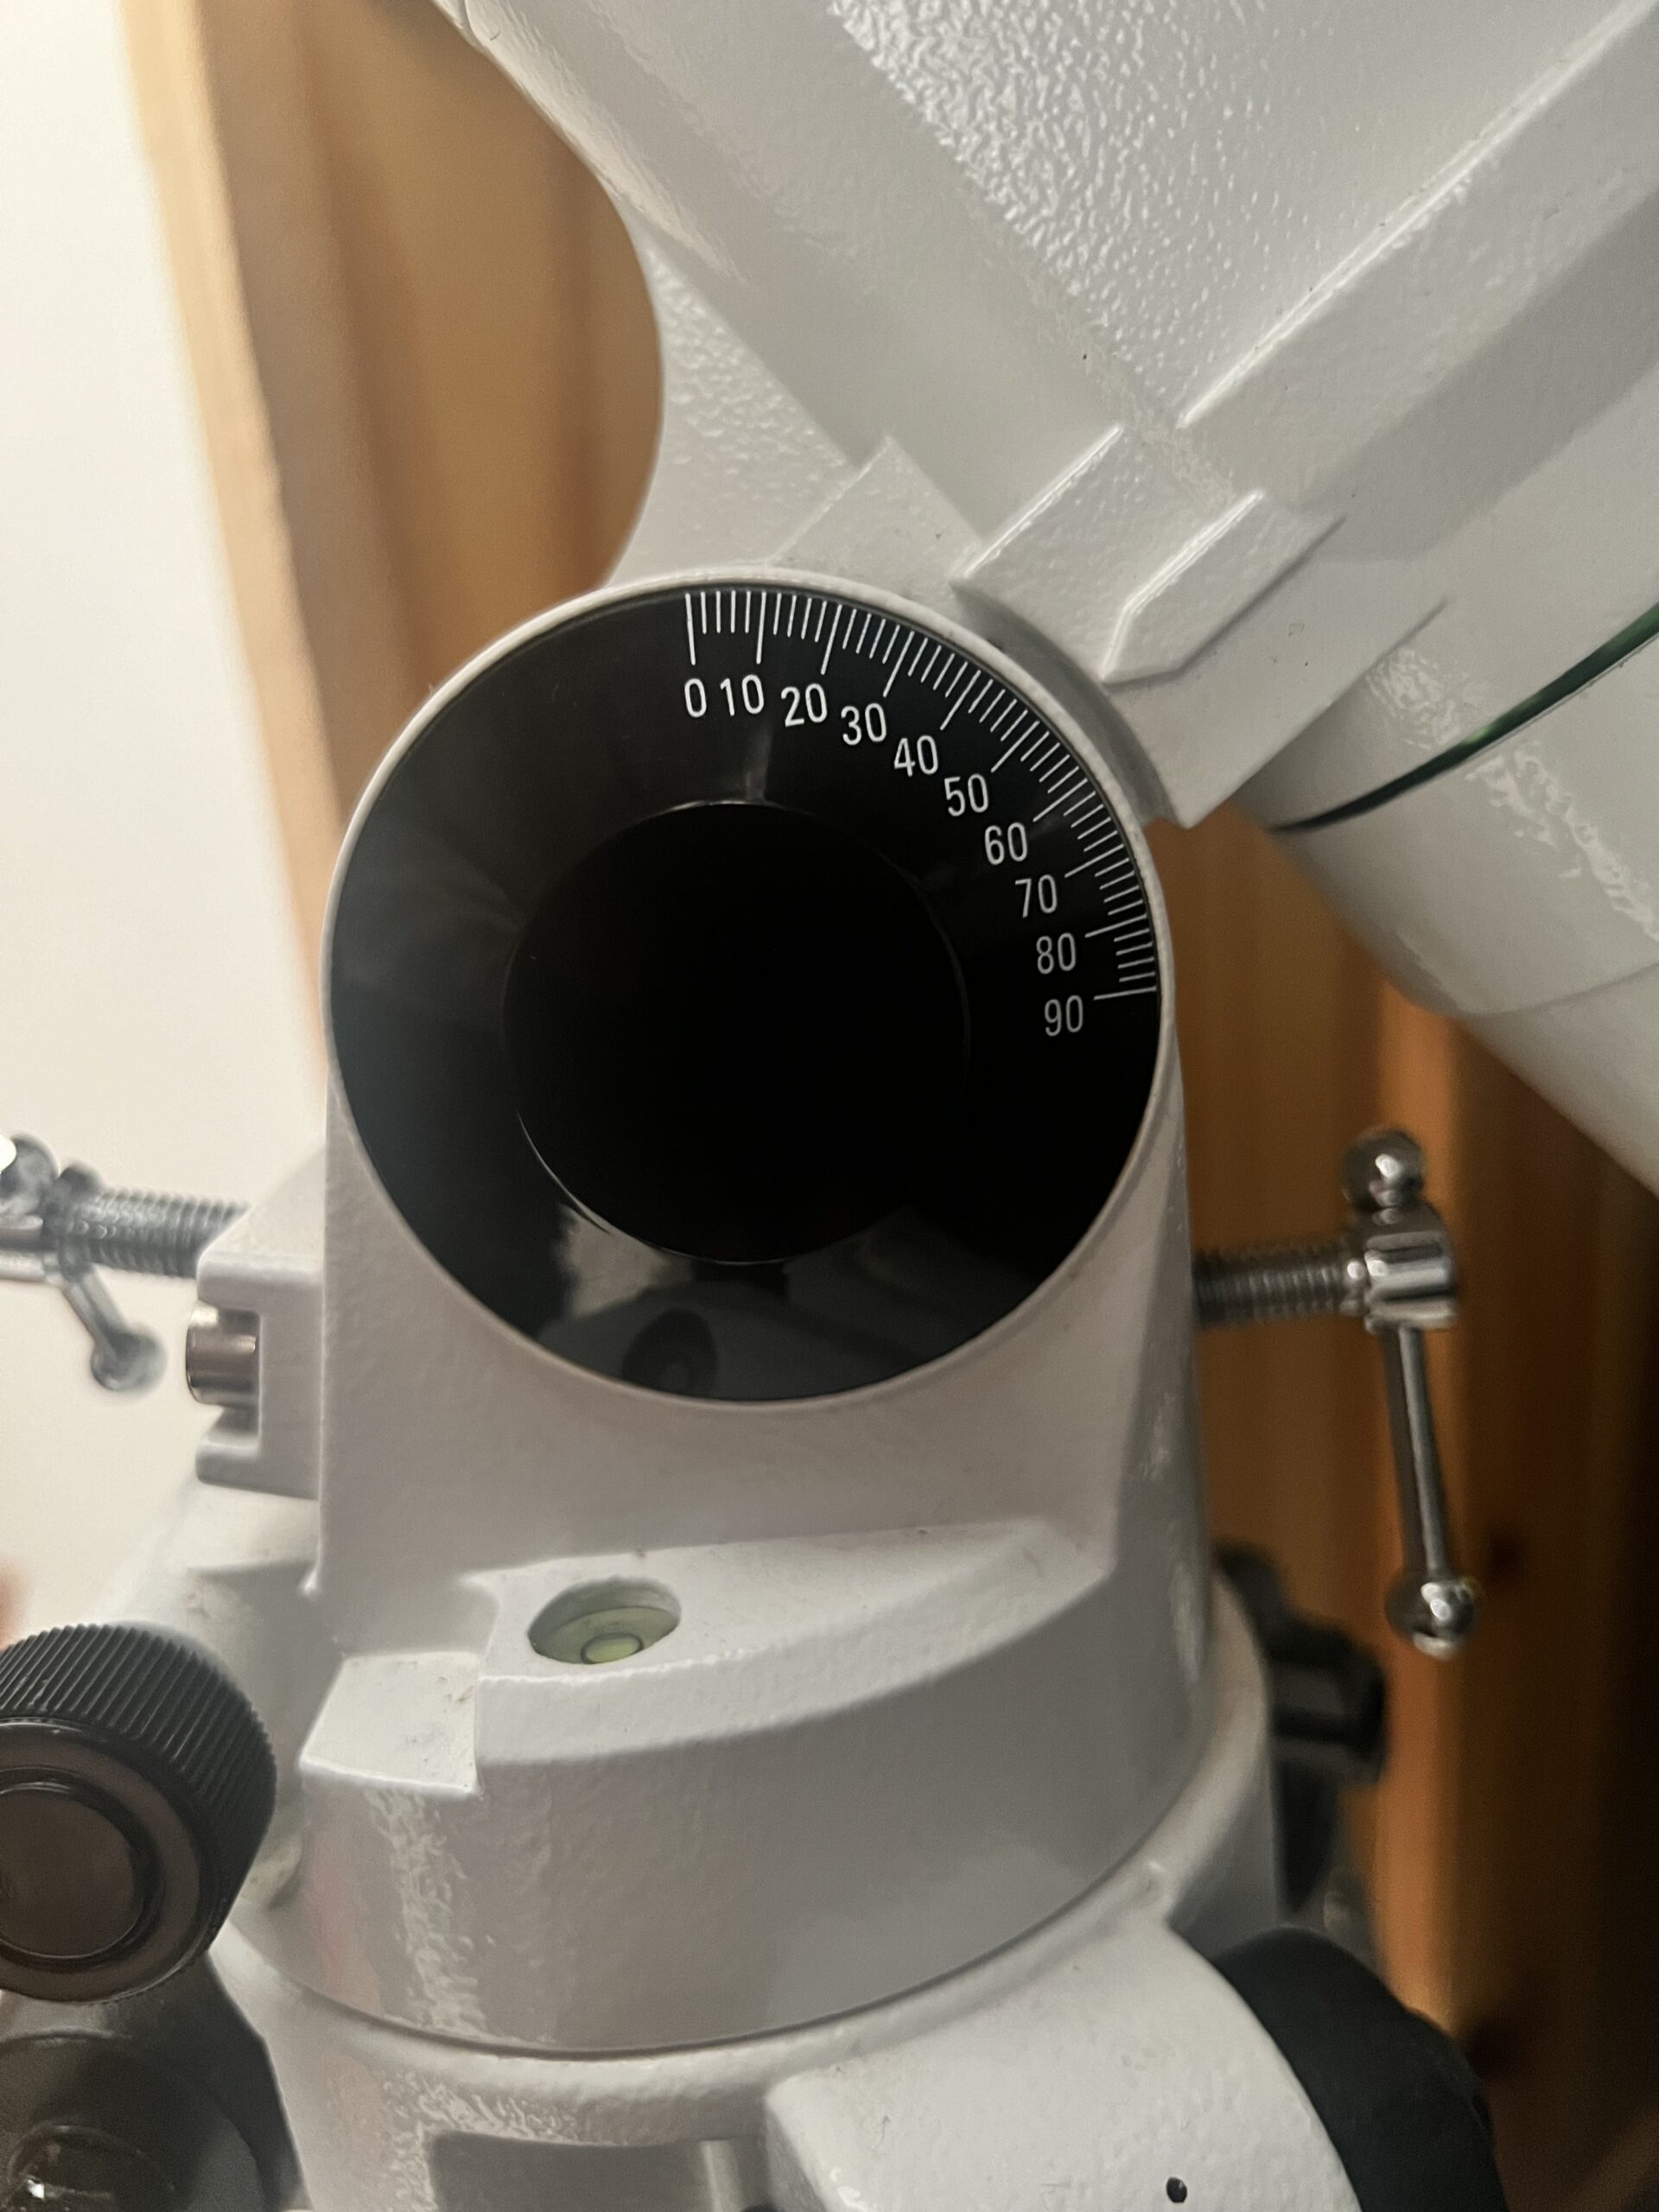
By setting the latitude correctly, you’re tilting the mount’s Right Ascension (RA) axis to match your location on Earth, ensuring that it rotates in sync with Earth’s daily motion. If the latitude is incorrect, the mount won’t track accurately, causing objects to drift out of view, especially during long-exposure astrophotography.
There are some setting circles on the polar alignment scope and I’m not entirely sure what they are for and if I should be using them yet. If an object is too faint, I think you can use setting circles on an equatorial mount. Setting circles enable you to locate celestial objects whose celestial coordinates have been determined from star charts. However, the mount has to be polar aligned first anyway and the R.A. setting circle must be calibrated before using the setting circles. Maybe we will come back to this.
Fine-tuning with the Polar Alignment App
At this point, I could see Polaris through the polar scope, but this was just a rough alignment. To get it perfect, I used a polar alignment app, which is essential for this stage. I use the app below, which is free and gives you everything that you need to polar align. Within the app, you can change the polar scope so that it matches how your polar scope looks on your mount.
These apps tell you exactly where Polaris should appear in the polar scope, based on your current location and the time. Think of it as a clock: the North Celestial Pole is at the centre, and Polaris rotates around it. Many polar scopes have 0-3-6-9 around the scope (or clock) and the app shows you where Polaris should be on this imaginary clock at the current moment. In my case, Polaris needed to be between 0 and 3 on the clock.
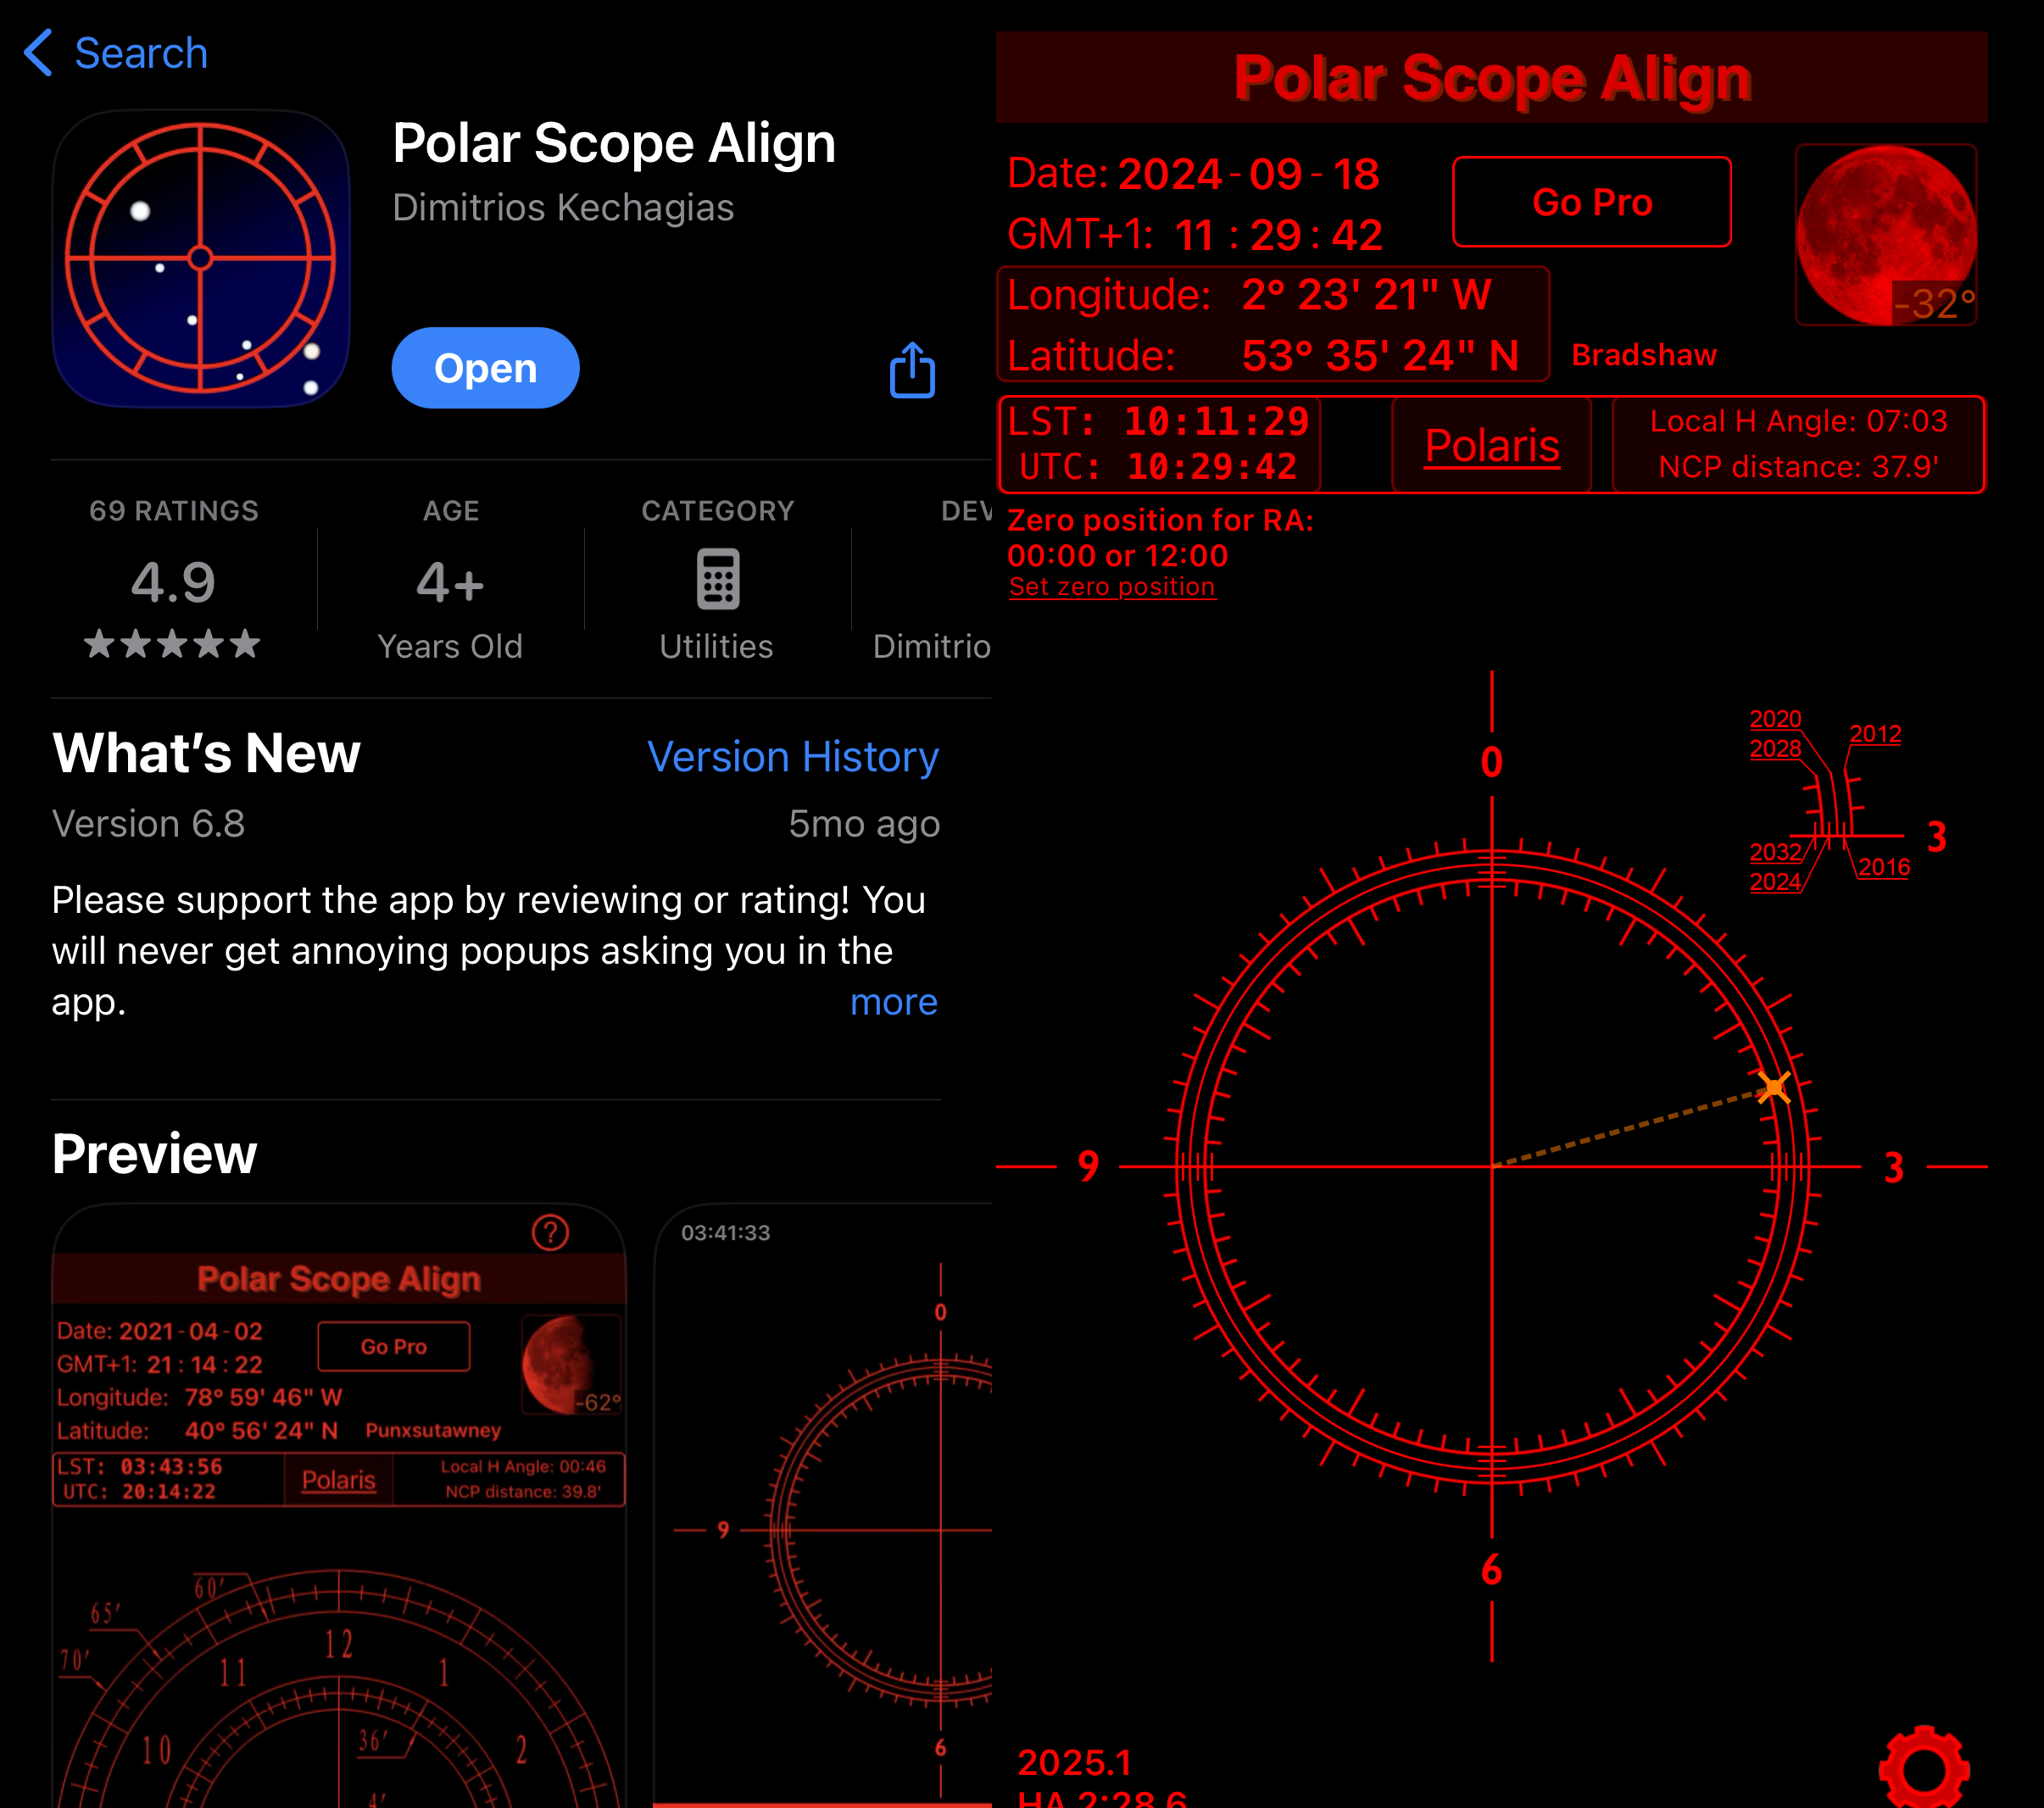
I looked through my polar scope and I adjusted the mount using the two sets of screws on the mount until Polaris was exactly where the app said it should be. There are the Altitude bolts (for raising or lowering the telescope to match your latitude) and the Azimuth knobs (for turning the telescope left or right to align with Polaris). The entire process took a bit longer than expected, mostly because it was my first time, but I finally got it right.
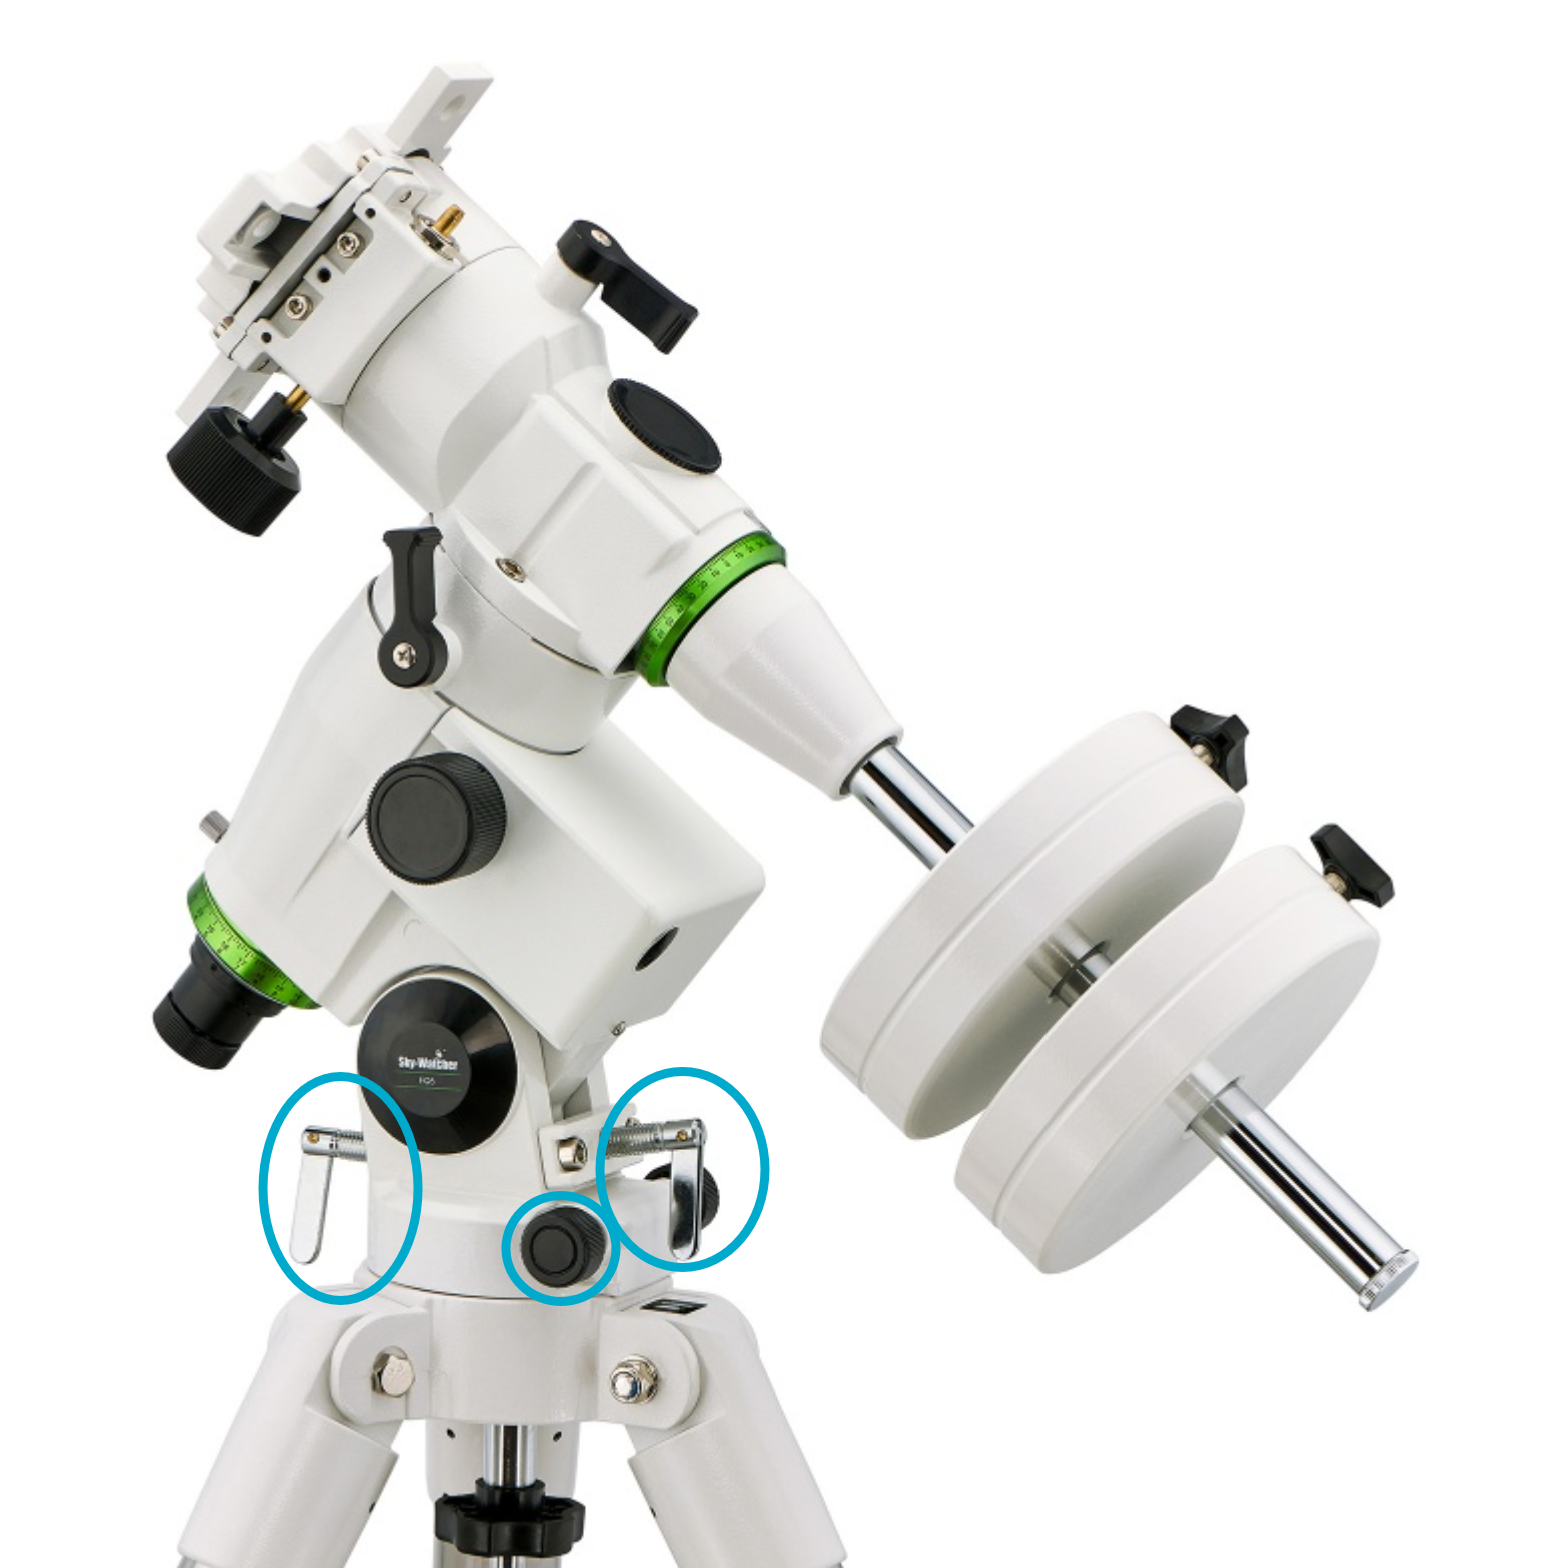
Once what you through the polar scope matches what you see on the app, you are ready to get the go-to system up and running.
Just as a note, the angle that your polar scope is at may be rotated differently to your app. For example, the app shows 0 at the top of the circle, but my polar scope is at the top left. As long as Polaris is in line with where it should be, i.e. between 0 and 3, then it will be correct.
Engaging the Go-To System
Those who have read my previous post about which equipment I have purchased will know that I have been looking for a Go-To System for some time. As a reminder, this is attached to your telescope mount which located and automatically tracks celestial objects. You punch a star, a nebula, or a planet and it’ll take you right there. Trying to take images of objects in space is difficult when the night sky is moving, and the further away they are the more they move.
With the polar alignment completed, it was time to activate the Go-To system on the EQ3-PRO mount. This is where things got interesting – and occasionally frustrating. After turning on the system and entering all the necessary data (latitude, longitude, time zone, elevation, date, and time), I started the star alignment process.
For this, you select one or more stars to help the system calibrate. I chose the summer triangle of Vega, Altair, and Deneb – bright stars that are easy to spot in September. The mount then slews the telescope to each star, and you adjust the alignment using the hand controller until the star is centered in the finder scope and eyepiece.
Sounds simple enough, right? Well, my first few attempts didn’t go quite as planned. The first time, the telescope pointed in the completely wrong direction. I quickly realized I had fitted the telescope upside down, leaving the back of the scope pointing upward. On my second try, the telescope was positioned too low and hit the mount when it rotated. The third time, the cables got tangled and unplugged the power supply. By this point, I was starting to lose hope.
On the fourth attempt, everything finally clicked. The telescope slewed to Vega, and with a few small adjustments, I had it perfectly aligned. I added Altair and Deneb to the alignment, and suddenly, I was ready to explore the night sky.
Star Gazing and Photographing the Supermoon
With the Go-To system aligned, I spent the next hour gazing at the summer triangle which stood out brightly against the dark backdrop of space. Every time I looked through the finder scope, I marvelled at how steady the stars appeared. The mount tracked their movement perfectly, keeping them centered for extended periods of time – a game-changer for astrophotography.
Finally, it was time to turn my attention to the supermoon. The Harvest Moon looked massive and brilliantly bright, even more so than usual because of its proximity to Earth. I switched out the eyepiece for my Canon 550D camera and began taking pictures.
The clarity was astonishing. The EQ3-PRO’s precise tracking meant I could take longer exposures without worrying about the moon drifting out of view. I captured several images of the supermoon, with the bright, glowing edges contrasted beautifully with the darkened portion, creating a stunning visual. But, like I already mentioned, my skills are still lacking when it comes to using the camera. I need to play around with the photos to see if there is more detail than I first thought.
Final Thoughts
This night taught me a lot about both the technical aspects of astrophotography and the importance of patience. From polar aligning my mount to troubleshooting the Go-To system, there were moments when I felt frustrated, but each challenge brought me closer to mastering my equipment.
Looking up at the supermoon and the stars of the Summer Triangle through my telescope reminded me why I fell in love with astronomy in the first place. There’s something profoundly humbling about connecting with the cosmos, knowing that the light from those distant stars has travelled for millions of years just to reach my eyes.
If you’re new to astrophotography or just starting your astronomy journey, my advice is simple: stick with it. The technical learning curve can be steep, but the rewards are more than worth it. I look forward to many more nights under the stars, now that I’ve had my “first light” with my new equipment.

Shaun Johnston
The Astronomers Founder
After blending an academic background in History with professional expertise in consumer research, Shaun has transitioned from unravelling historical mysteries to exploring the cosmic unknown. Fuelled by a lifelong passion for astronomy, he embarks on a celestial journey of discovery. Join Shaun in his mission to learn and navigate the night sky, unveiling the wonders of the universe and sharing the enchanting cosmic journey through his astronomy blog.
Check out more of our articles below!
Want new articles as they get published?
Subscribe to our newsletter!
0 Comments
Submit a Comment
Want new articles as they get published?
Subscribe to our Newsletter.

Shaun Johnston
The Astronomers Founder
After blending an academic background in History with professional expertise in consumer research, Shaun has transitioned from unravelling historical mysteries to exploring the cosmic unknown. Fuelled by a lifelong passion for astronomy, he embarks on a celestial journey of discovery. Join Shaun in his mission to learn and navigate the night sky, unveiling the wonders of the universe and sharing the enchanting cosmic journey through his astronomy blog.


0 Comments