Gearing Up for the Galaxy: My First Telescope Upgrade
As part of my ongoing exploration into astronomy and astrophotography, I recently upgraded my gear to something more advanced. After much deliberation (and a few eBay hunts), I finally settled on two key pieces of equipment: the SkyWatcher Explorer 150PDS Telescope and the SkyWatcher EQ3 PRO Go-To Mount. These tools should significantly elevate my astrophotography game for a reasonable price. But before diving into the technical specs, I want to explain why I chose them.
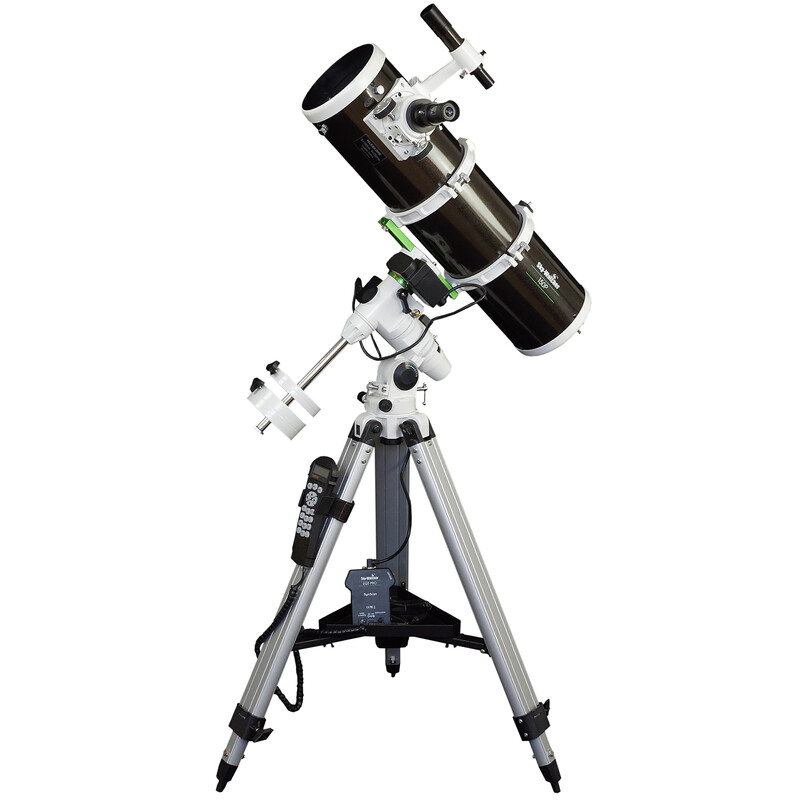
Sky-Watcher EQ3 PRO: My First Go-To Mount
If you’ve ever tried manually aligning a telescope with the stars, you know how challenging it can be, especially in light-polluted urban skies. I spent weeks reading forums, product reviews, and watching YouTube videos, and all recommendations pointed in the same direction – your mount is more important than your telescope. Now, this may change the deeper you get into astronomy, but in the beginning, one of the hardest tasks, beyond learning how to navigate the sky, is keeping your telescope aligned with an active sky. All roads pointed towards a Go-To system, which tracks objects automatically, compensating for the Earth’s rotation. This means you can take long-exposure images without losing track of any target. You align your telescope with Polaris and then use the Go-To system to identify key objects in the sky. Once this setup is complete, you can punch in any object in the sky and it will point your telescope at it.
The tricky part was deciding which mount I should purchase. There are Alt-AZ mounts vs equatorial mounts vs Dobsonian mounts. There are EQ vs HEQ vs EQ-Pro. The language surrounding the different types of mounts is daunting and unclear, and the more research you do the more you realise you need to pay more to get what you want. I started looking at simple telescope tripods and by the end, I wanted the Sky-Watcher EQ8-Rh Astronomy Mount with Renishaw RA Encoder for £6000.
The reality is, whilst that may be the goal, my current astrophotography skills do not require such an expensive piece of equipment, and I should walk before I can run. Guided by reviews, SkyWatcher mounts appear to be some of the best entry-level and professional mounts on the market. I became obsessed with getting a SkyWatcher HEQ5 PRO Equatorial Go-To mount.
These ranged around the £1,000 mark, which is well outside my budget, but they appear to be the most future-proof mount that fits with my ambitions for astronomy. It allows for any larger/heavier telescopes and includes the Go-To system that automatically tracks celestial objects (the PRO element to these mounts indicates it includes the Go-To system built-in to the mount – those without the PRO can buy a separate upgrade that can make it a Go-To system – see here). Upon searching for deals and offers for a couple of months I was unable to find this mount at a suitable price.
Taking my focus off the HEQ5 PRO and exploring different options, led me to a post that was selling a SkyWatcher EQ3 PRO Go-To Mount AND a SkyWatcher Explorer 150PDS telescope as a bundle for £310. I needed a new telescope anyway, so I snapped up the offer and bought myself my first real telescope and mount.
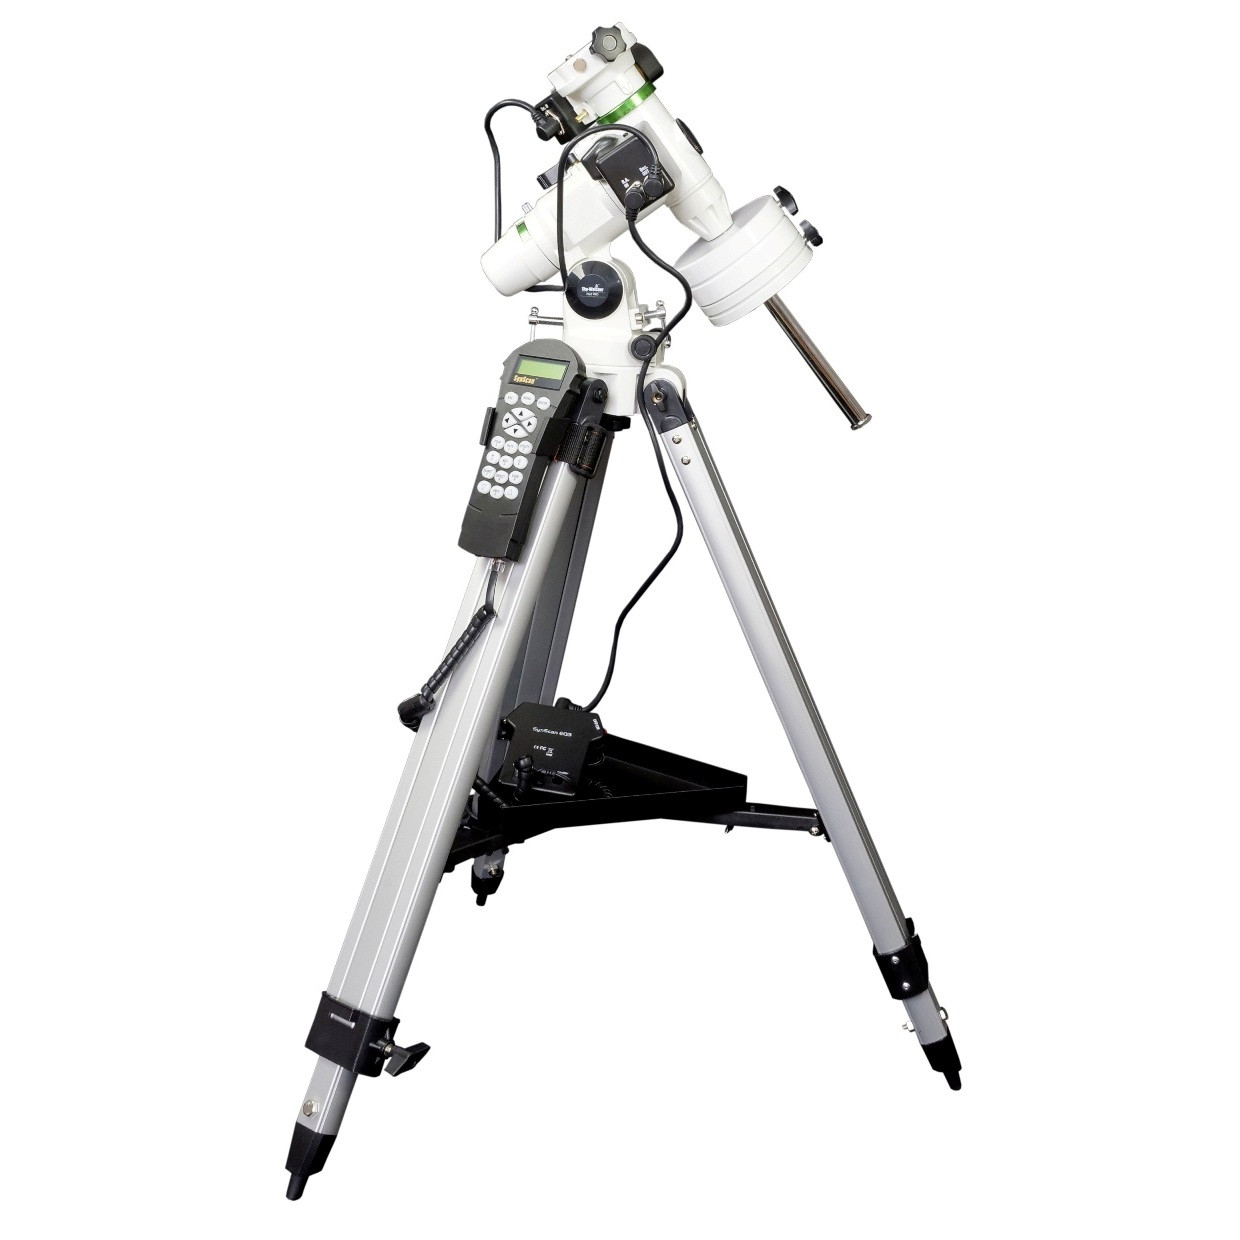
Whilst the more expensive mounts were appealing, the EQ3 Pro is MORE than enough for somebody at my level, so don’t be misguided into buying something out of your price range because it feels like you need the best, or latest, or most future proof – this is a serious piece of equipment. I haven’t had the chance to use the Go-To system to its full capabilities yet, but I’m excited to see what it can do. Having the ability to automatically track objects will be a game-changer for my astrophotography. And I will say this, the EQ3-Pro mount is big, and it is heavy. Don’t let any pictures misguide you, you need some space if you want to keep it up permanently.
Here are some of the mount specifications with some guidance on what the terms mean:
- Payload Capacity: 5 kg for imaging, 7 kg for visual
(this represents the weight of the telescope it can take, hence the future-proof comments. The telescope I’ve purchased is 4.9kg and therefore perfect for this mount but if I were to upgrade to a bigger telescope then it may not perform as effectively. The heavy the telescope the less stable the mount is, therefore affecting image quality.)
- Go-To Object Database: Complete Messier, NGC, and IC catalogues
(this references the objects you can identify in space with the Go-To system – you can still enter Declination and Right Ascension coordinates too if a particular area is not covered)
- Slewing Speed: Up to 3.4°/sec
(slewing refers to the speed at which a mount moves the telescope from point A to point B in the sky. For example, if you are switching from one object to another in the night sky and they are very far apart then slewing will be faster)
- Guiding Speeds: 0.25x to 1x
(this refers to the speed at which the mount makes corrections to keep an object centred in the field of view during long exposures. Lower guiding speeds like 0.25x are gentler corrections, which are useful when you’re tracking very precisely and want smooth adjustments to avoid over-correction. High guiding speeds allow for quicker corrections when larger deviations are detected, but may introduce more abrupt movements if not needed.)
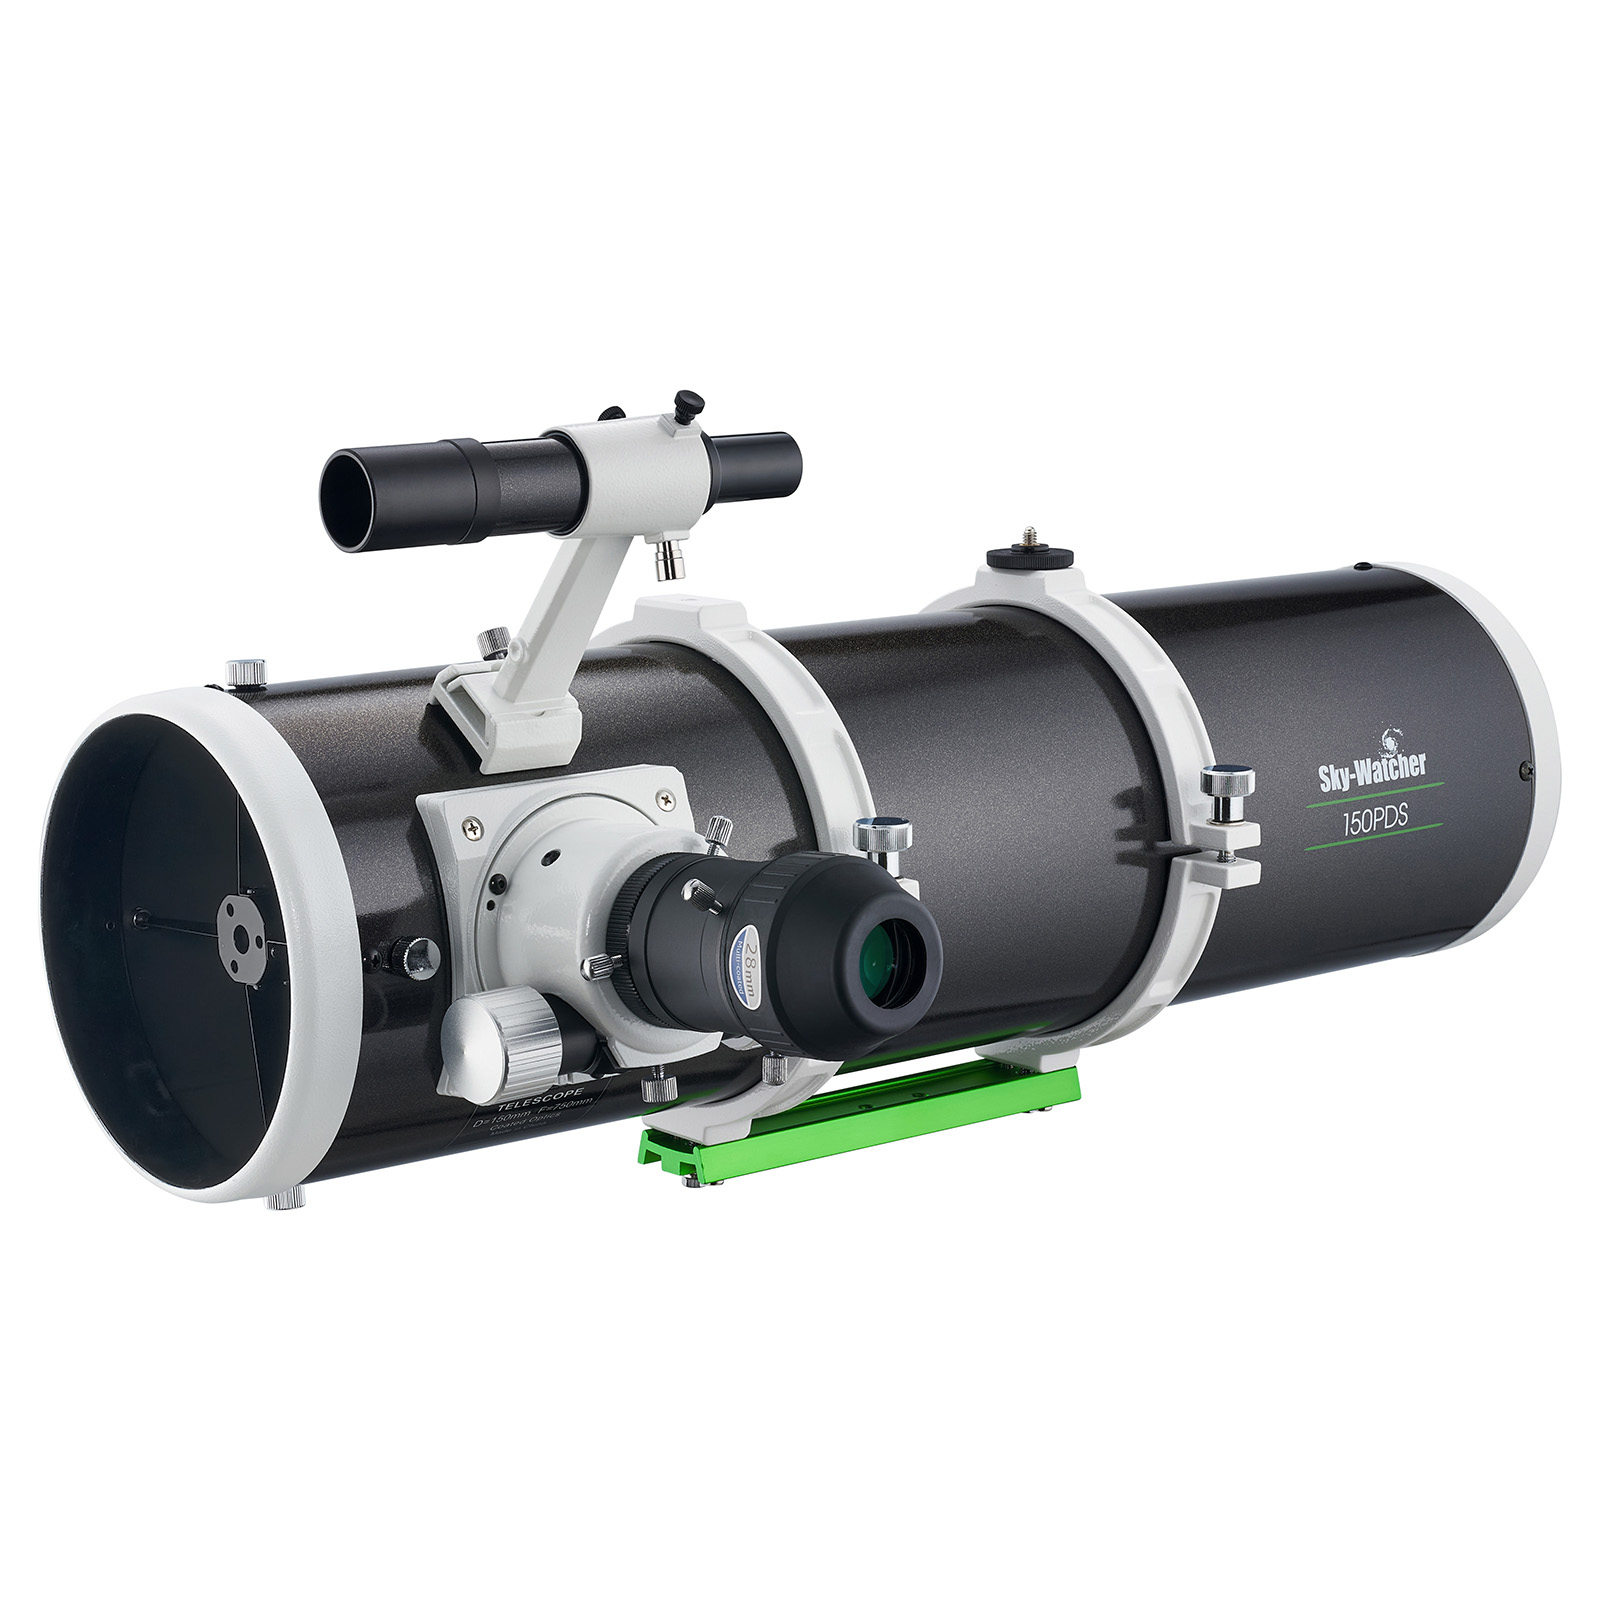
SkyWatcher Explorer 150PDS Telescope
I must admit, choosing the SkyWatcher Explorer 150PDS wasn’t a deeply researched decision. The telescope came bundled with the mount, which was my priority. But I’m happy with the telescope so far, and here’s why.
The SkyWatcher Explorer 150PDS is a Newtonian Reflector Telescope, a category known for being cost-effective and ideal for deep-sky observations. Reflector telescopes like this one, use mirrors instead of lenses to focus light. Compared to refractors, which are great for viewing planets and the Moon, Newtonian reflectors excel at capturing distant galaxies, nebulae, and star clusters. For someone like me, who is keen on deep-sky astrophotography, this telescope is well-suited to the task.
The “P” in 150PDS stands for Parabolic – indicating the primary mirror is designed for astrophotography. The Dual-Speed (DS) focuser allows for fine adjustments, which is critical for achieving sharp images. This feature makes it more suited for long-exposure astrophotography, something I hope to explore in the near future.
Here are some specifications:
- Aperture: 150mm
- Focal Length: 750mm (f/5)
- Focuser: 1.25″/2” Dual-Speed 10:1 Crayford
- Eyepiece: 28mm 2″ LET (Magnification: x30) – unfortunately this wasn’t included in the product I purchased.
- Tube weight: 4.9 kg
For beginners or hobbyists looking to capture distant objects, this telescope offers solid value for its price range, and the enhanced focus control and larger secondary mirror are designed to optimize it for imaging. Whilst I have used the telescope to practice, I can report back when I have spent more time with the product to give it a full review/guide.
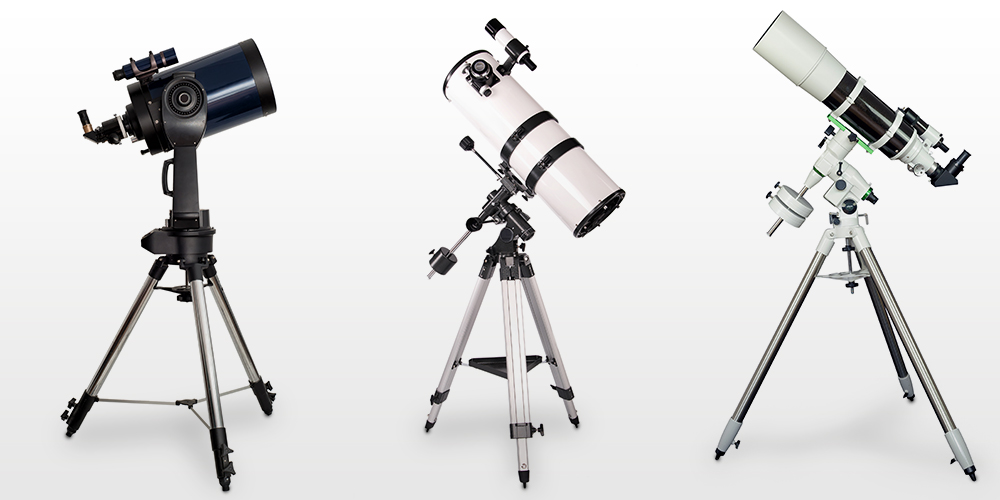
Understanding the Telescope Types
Whilst we are on the topic, it is useful to quickly run through the three main types of telescopes: refractors, reflectors, and catadioptric. Here’s a quick breakdown:
- Refractors: Use lenses to focus light. These are typically longer and more expensive as the aperture increases. Best for planetary and lunar imaging.
- Reflectors: Like my Explorer 150PDS, these use mirrors to focus light. They offer great bang for the buck, especially when it comes to aperture size. Reflectors can suffer from upside-down images, and the mirrors need occasional collimation (realigning).
- Catadioptric: A mix of lenses and mirrors, these are compact and portable. They are excellent all-rounders for both planetary and deep-sky imaging.
Newtonian reflectors like mine are ideal for deep-sky objects like galaxies and nebulae, whereas refractors are generally preferred for imaging planets and the Moon. This was one of the key reasons I am happy with the 150PDS – it’s optimized for deep-sky objects, which is where my interest currently lies.

The Struggles of a Beginner Astrophotographer
Even with this fantastic equipment, my journey into astrophotography has been far from smooth. My backyard is limited in terms of sky visibility, and I’ve struggled with focusing and finding the right targets. The long summer nights didn’t help my motivation, and I found myself taking a break after a few failed attempts.
But I’ve recently found a new spark! I’ve been learning about collimation (the process of aligning the mirrors in my telescope) and feel more confident in getting things right. I’ll be sharing a guide soon on how to collimate your reflector telescope using a laser.
In another exciting development, I’ve applied to join the Manchester Astronomical Society. They hold lectures at the University of Manchester, and I’m looking forward to learning from experts and connecting with fellow enthusiasts. Joining a community of astronomers is something I’ve been meaning to do for a while, and I’m eager to see how it enhances my journey.
Though I’m still getting the hang of my new telescope and mount, I’m feeling optimistic about the future. Every challenge has taught me something new, and with the right tools and a bit of patience, I believe I can start capturing the skies in ways I’ve only dreamed of. If you’re just starting out, don’t get discouraged by the learning curve – it’s all part of the journey!

Shaun Johnston
The Astronomers Founder
After blending an academic background in History with professional expertise in consumer research, Shaun has transitioned from unravelling historical mysteries to exploring the cosmic unknown. Fuelled by a lifelong passion for astronomy, he embarks on a celestial journey of discovery. Join Shaun in his mission to learn and navigate the night sky, unveiling the wonders of the universe and sharing the enchanting cosmic journey through his astronomy blog.
Check out more of our articles below!
Want new articles as they get published?
Subscribe to our newsletter!
0 Comments
Trackbacks/Pingbacks
- My First Polar Alignment Under a Supermoon | The Astronomers - […] adapters to connect the camera and lenses to the telescope, and a few other bits and pieces. Check out…
Submit a Comment
Want new articles as they get published?
Subscribe to our Newsletter.

Shaun Johnston
The Astronomers Founder
After blending an academic background in History with professional expertise in consumer research, Shaun has transitioned from unravelling historical mysteries to exploring the cosmic unknown. Fuelled by a lifelong passion for astronomy, he embarks on a celestial journey of discovery. Join Shaun in his mission to learn and navigate the night sky, unveiling the wonders of the universe and sharing the enchanting cosmic journey through his astronomy blog.



0 Comments
Trackbacks/Pingbacks